Bulk Add: Adding a module to multiple workspaces
The “Bulk Add” function allows Engage users to post a single module on multiple workspaces or multiple groups within those workspaces.
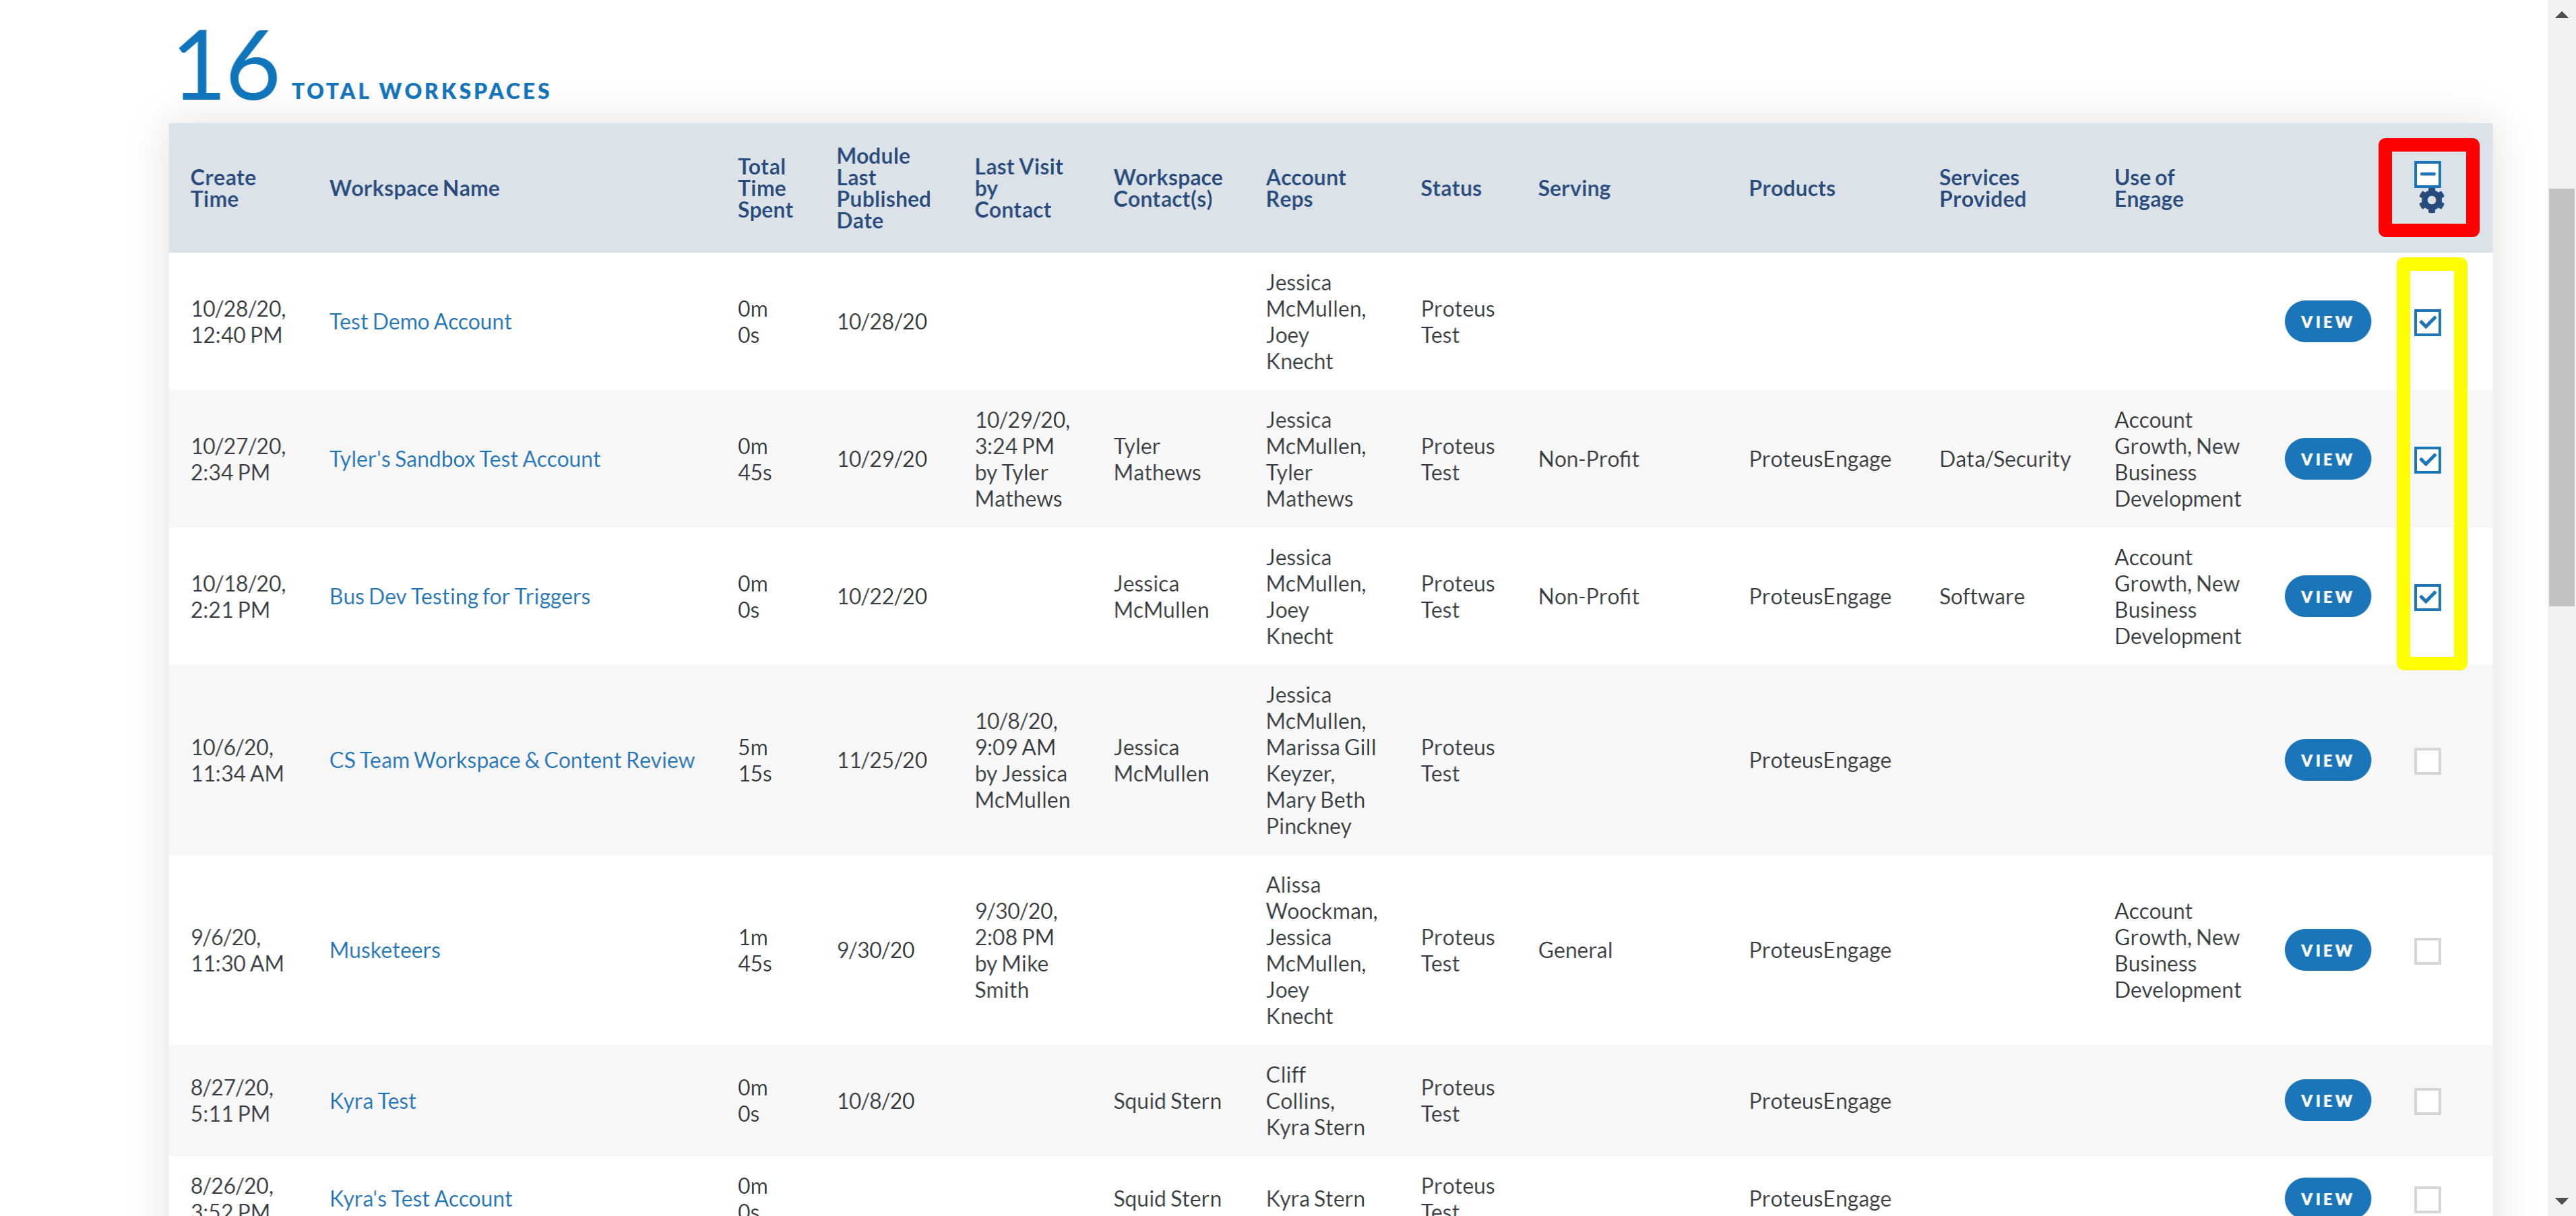
(1) In your workspace listing page, each workspace has a checkbox to the right of it’s row. Select all the workspaces you want to publish a module on.

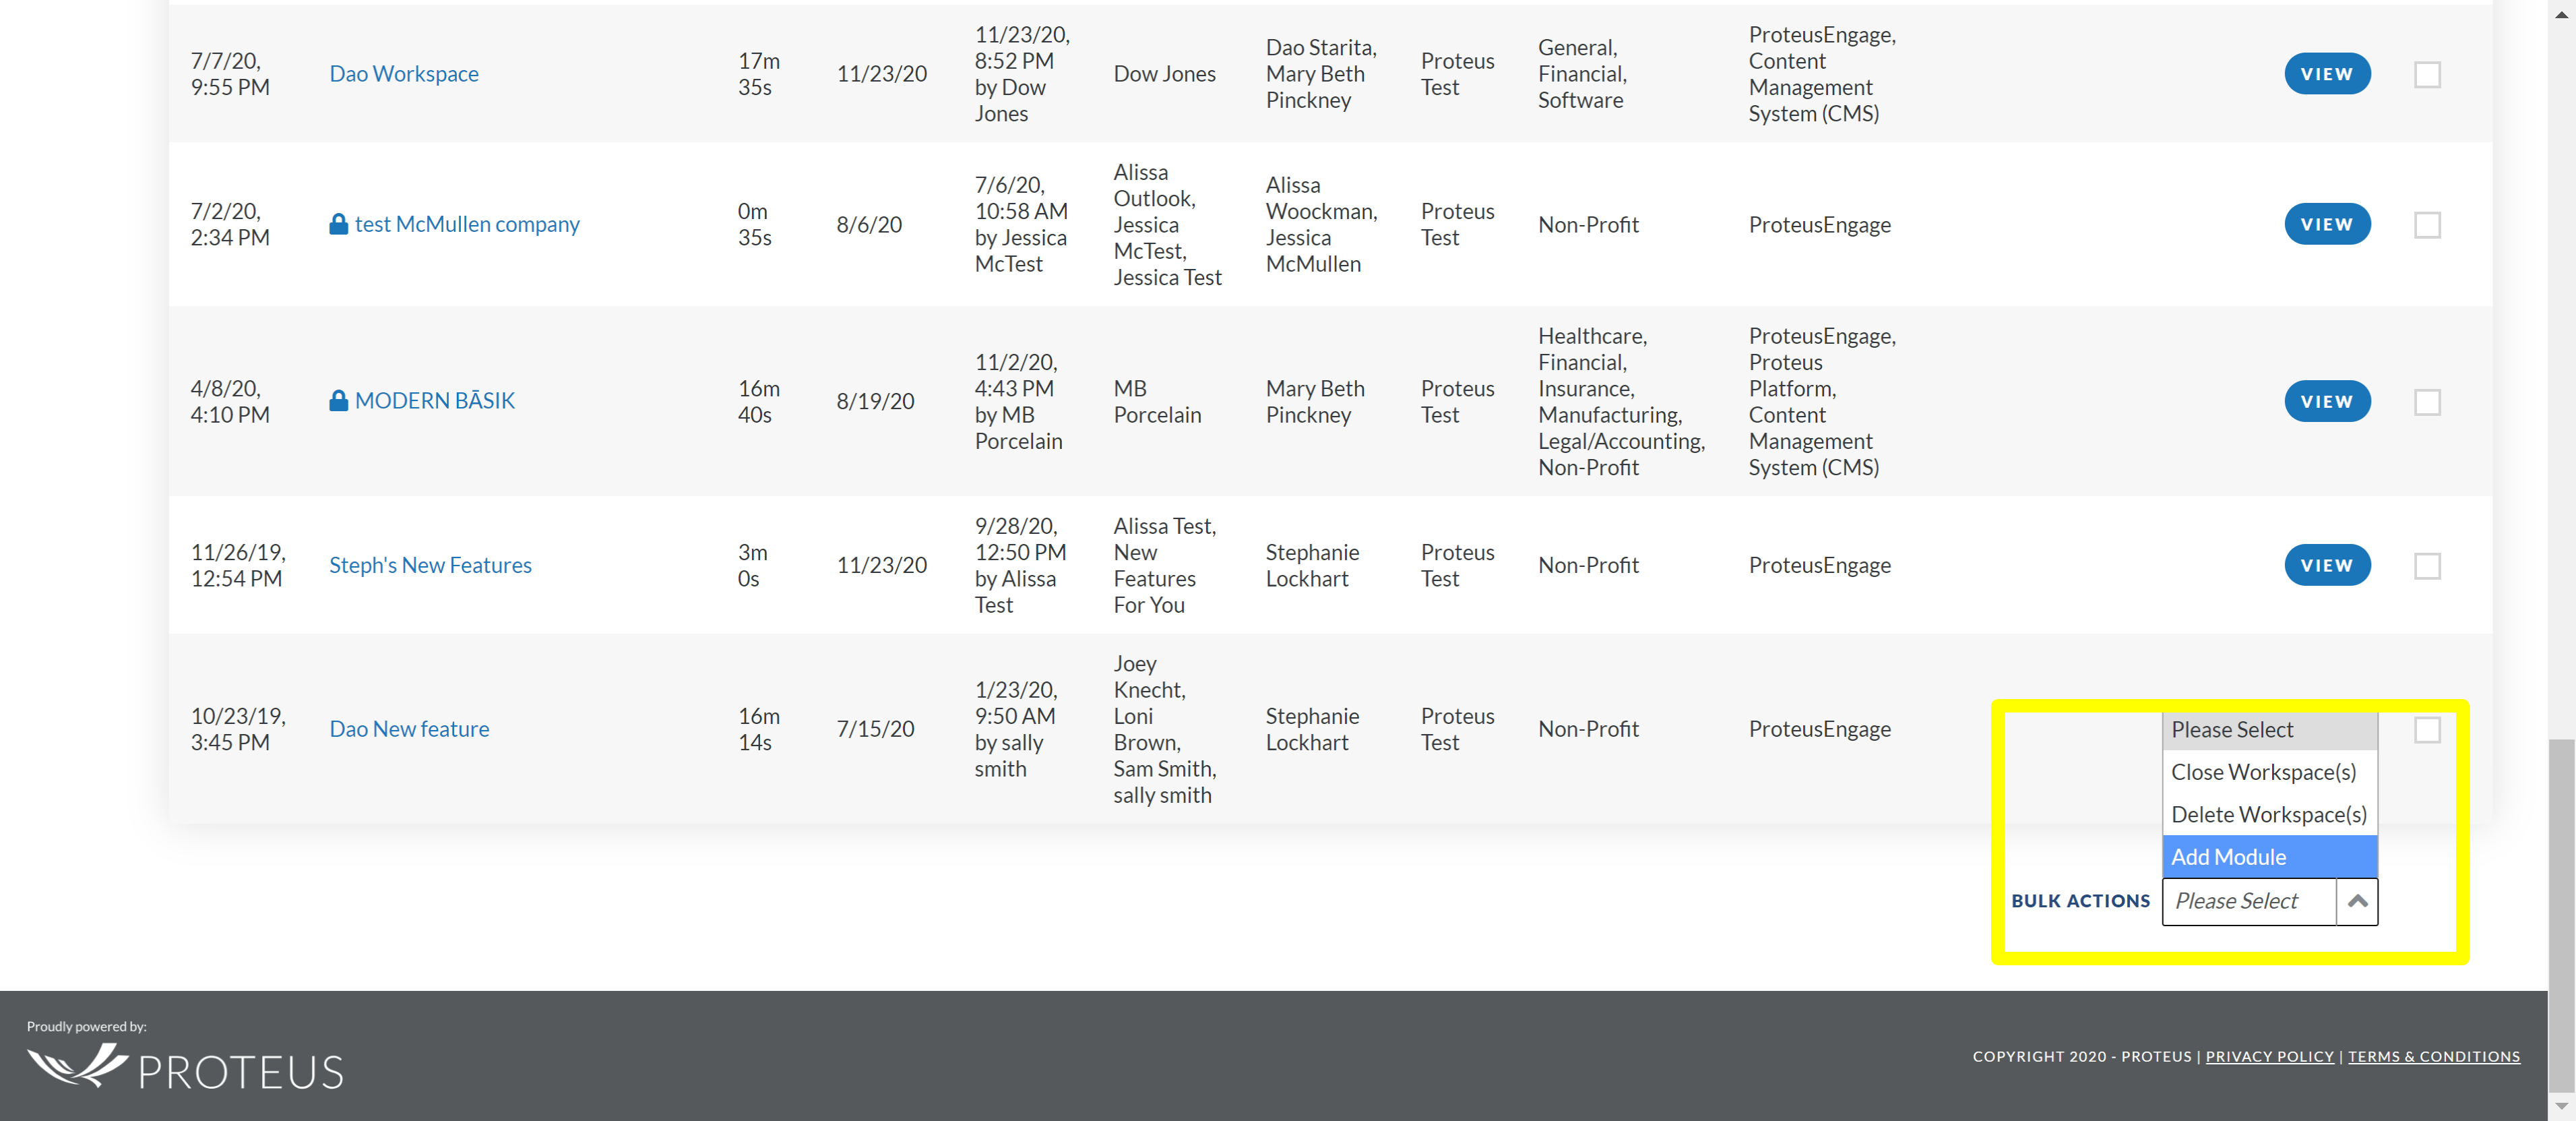
(2) Scroll down to the bottom, right corner of the page and you’ll see a “Bulk Actions” drop down.
(3) Click this drop down and select the “Add Module” option. You will be automatically directed to the Bulk Add Module interface

(4) From the drop-down provided, choose a module from your list of available modules. These modules are identical to the modules in your module menu.
(5) Once you select a module, the module will display. You can edit the module title and the content within the module. How the module appears on this screen will be how the module will appear on your selected workspaces/groups. Make sure the module looks correct before moving on to the next steps.
(6) Once the module looks how you want it, click the “next” button to move on to the next step.
(7) This next step allows the user to select whether this module is posted to a private group within a selected workspace or the general group within a selected workspace.
The drop-down to the right of each workspace name displays all “available” groups. The general group is always available to everyone. But the user performing this bulk add must be a participant in a private group in order for that group to appear as an option to select. You can also decide to remove a workspace that may have been accidently selected in the initials steps by clicking the red “X”.
(8) Once you have selected your intended groups for each workspace, click the “next” button to move on to the next step.
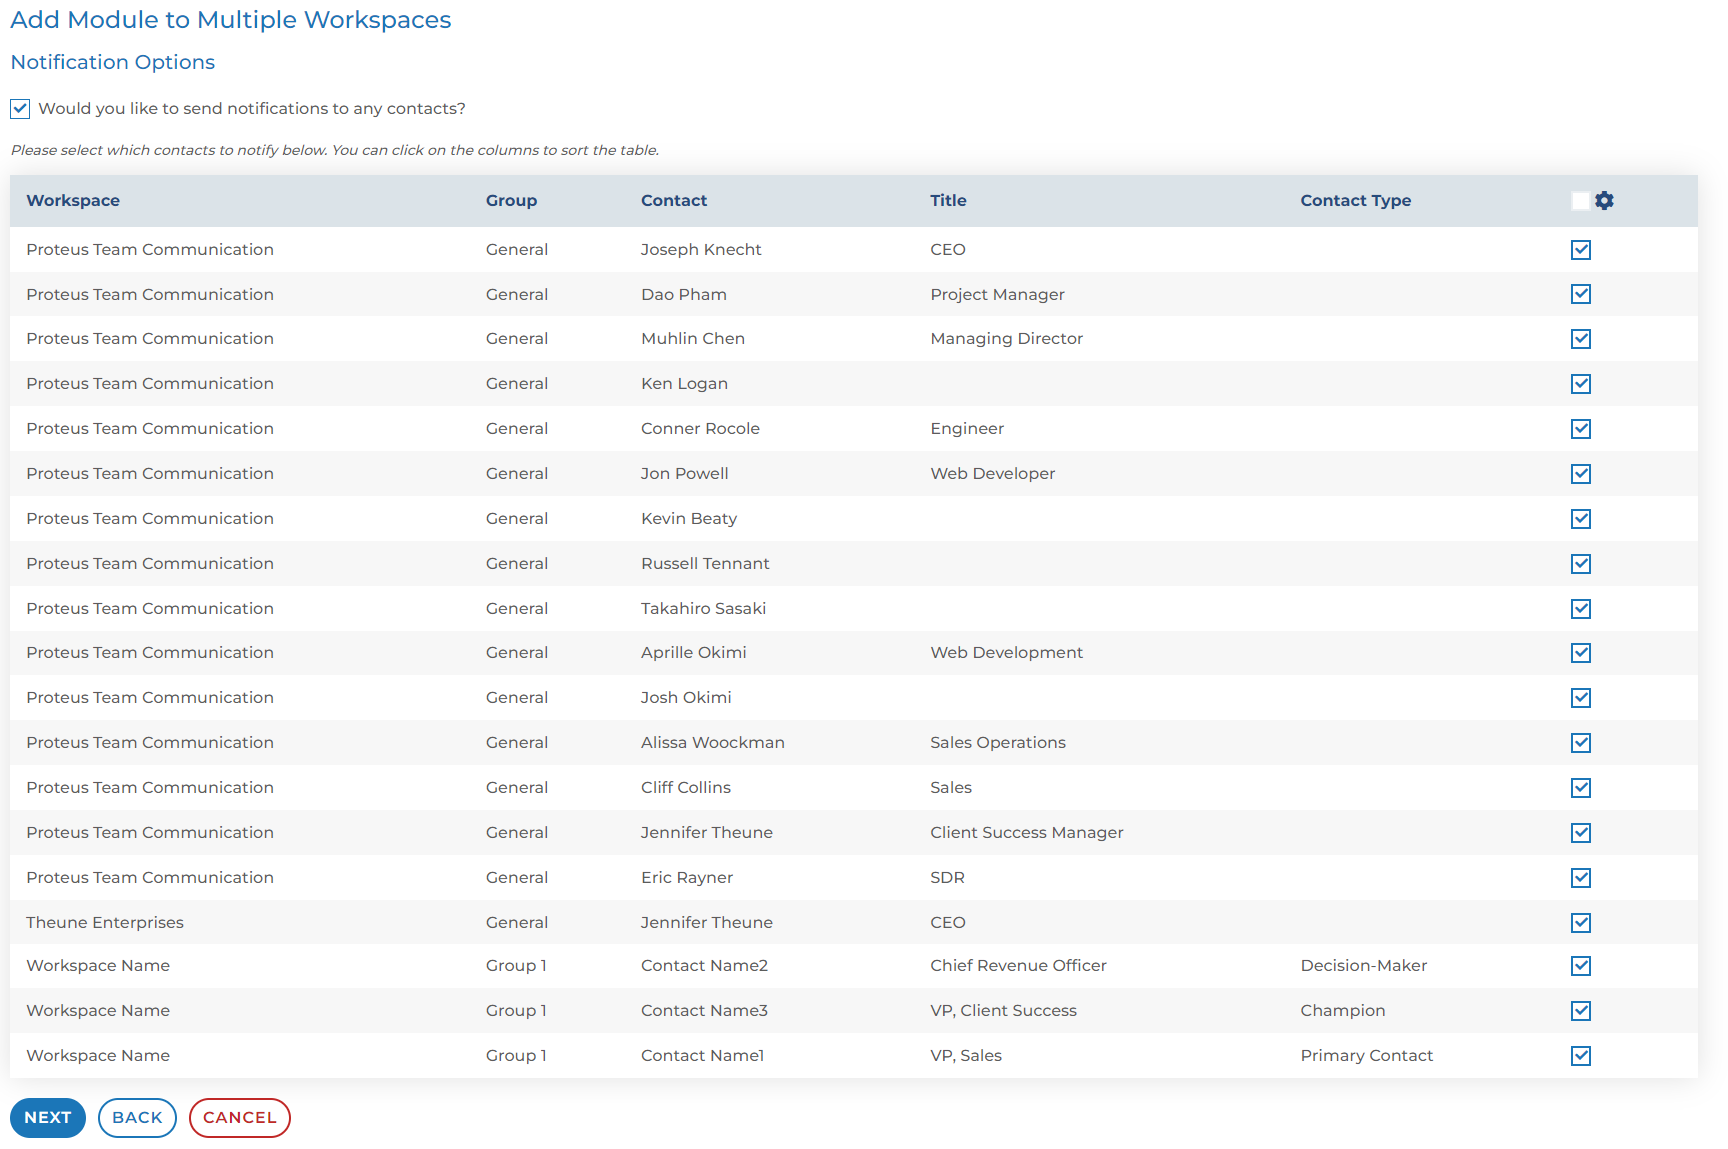
The next step involves the notification emails sent as a result of bulk publishing this module. If you do not wish to send email notifications as a result of the module being published, you can leave this box unchecked and move on to the next step. Check the check box if you would like to send a notification email. The email itself will be configured in the next step.
(9) Once this box is checked, all the contacts within the selected groups will appear. This table can be sorted by clicking one of the column names at the top. If the check box to the right of the contact is checked, this person will receive an email. All check boxes are checked by default.

(10) Once all the contacts you want to send an email notification to have been selected, click the “next” button to move on to the next step.
The next step is where you will edit the contents of the email notification. You can choose a template you’ve created or you can manually add the subject line and the content of the email. You can also configure this notification to be sent from a different user other than yourself.
(11) Once the email looks good to you, click the “next” button to move on to the next step.
This is the final step in the bulk add process. This is used to configure when the module should be published and also when the email notification should be sent (if you chose to notify contacts).
You have the option to publish the module/send notification now or at a later date.
You have the option to “require a manual review.” This creates a task for someone to review all the previous steps that have been configured before the module is published. Because we are selecting multiple workspaces, you can choose to set one task for the entire bulk publish or you can create separate tasks for the primary rep of each workspace.
You have the option to “unpublish” this module at a later date. This could be used for content that loses relevancy over time.
(12) Once this configuration matches your expectations, clicking the “schedule” button will initiate the bulk add.
If you choose to publish now, you will see a pop up window that shows you the sending progress. You’ll be able to exit once the sending is complete.
If you choose to publish later, you’ll automatically exited from the Bulk Add interface.
