Checklist: For Rep User
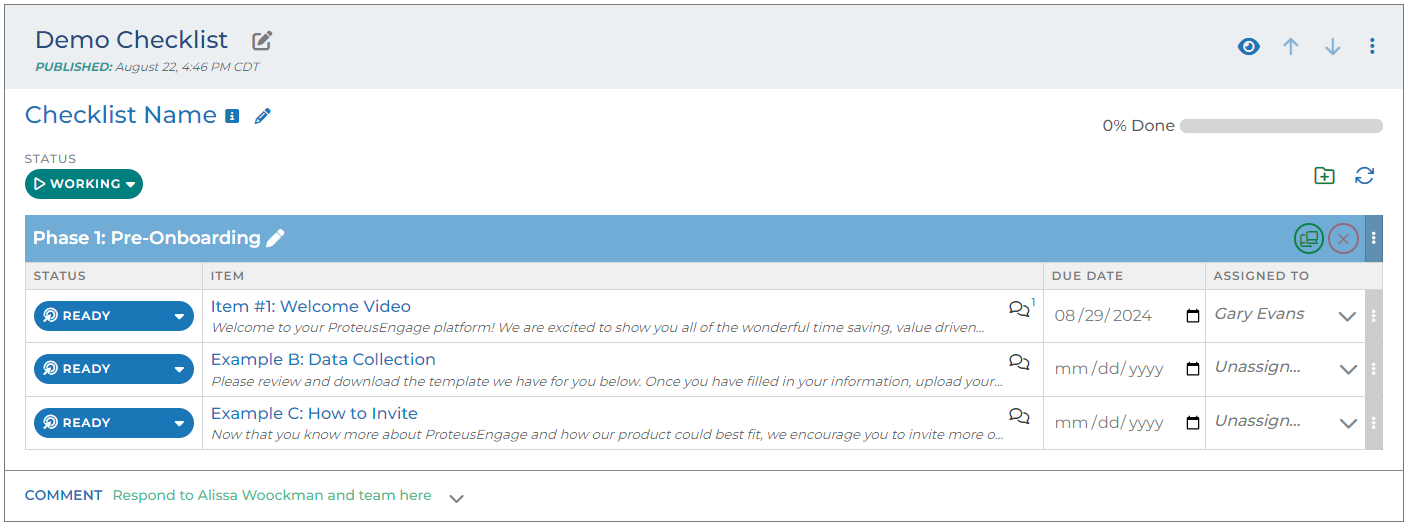
If you have a project you are working on and you need an interactive mutual plan, look no further than a ProteusEngage Checklist. A checklist contains a list of items that are assigned to users with due dates to complete. Each item contains a text description of what the task entails as well as images, videos, other modules, etc. as set by content managers.
Each checklist is contained in it’s own module and added to a workspace via the module menu.
Your content manager(s) have built predefined checklist templates and added these templates as modules for you to select and utilize in your workspaces.
You can open the edit view of the checklist item by clicking the settings cog icon. This allows you to edit the checklist item name, item description, contents of field types.
Any changes made to a checklist module on a workspace do not affect the checklist template, but only the individual checklist on that workspace.
Checklist Item Details
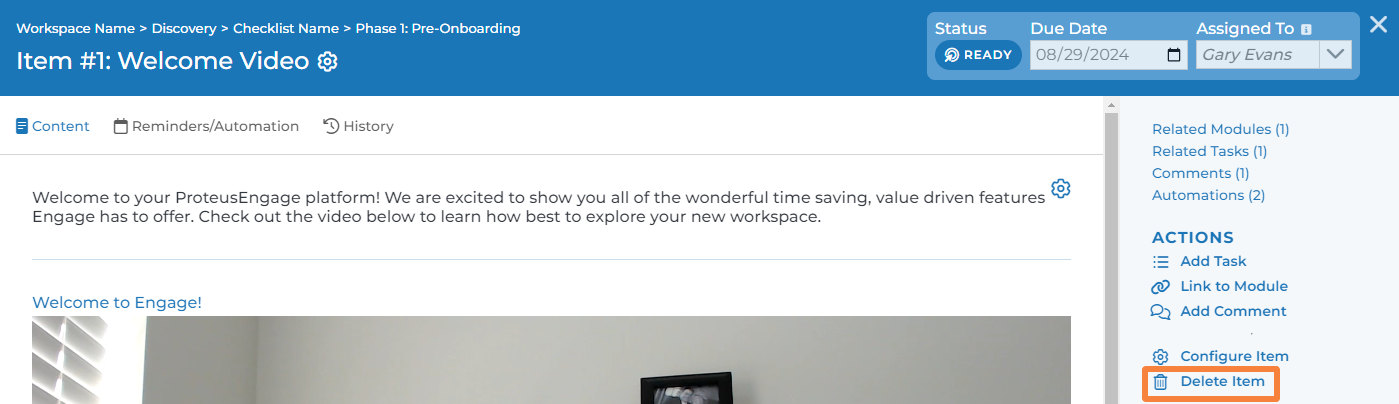
Each checklist item opens a detail page where you can see the description of the item, related modules, related tasks, and any comments made by the team.
Once a checklist module is on a workspace, reps can make edits or add additional items as needed.

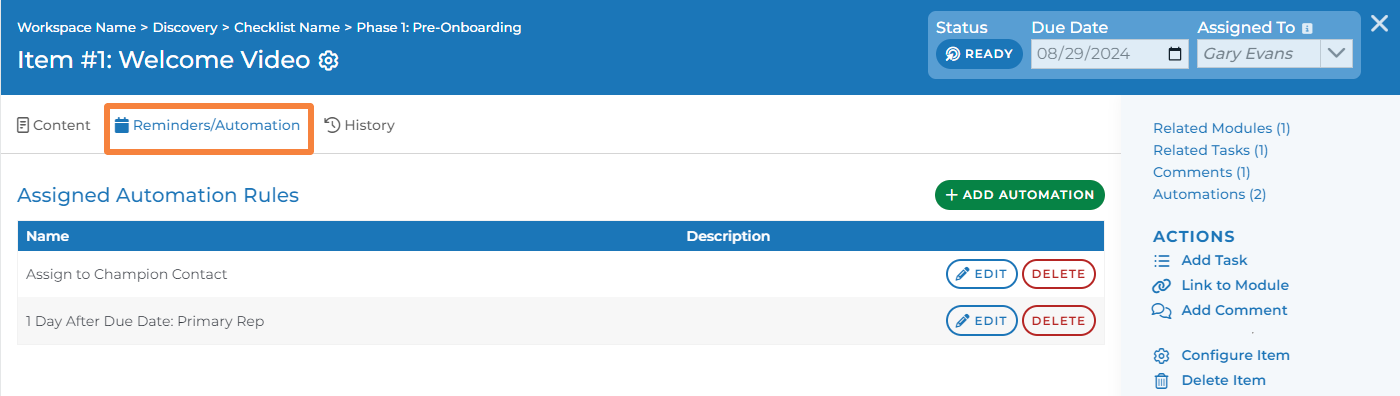
Once the detail view of a checklist item is open, you’ll notice there are several tabs: Content, Reminders/Automations, and History. These tabs are only visible to reps.

Content: This is where all the pieces visible to contacts live. This tab contains everything the assignee needs to know in order to complete this task.
Reminders/Automations: Reps can see which automations have been assigned to this checklist item. Automations are based on an action that triggers another action. For example, if a checklist item is not completed 1 day after the assigned due date, an email can be sent to any rep on the workspace alerting them of the unmet deadline.
Your content manager(s) have built predefined automations and added these to checklist items inside checklist templates. Reps can see the details of these automations by clicking the edit button to the right of the automation. This view will show you what actions and conditions trigger the automation as well as what action initiates as a result.
Reps can also add new automations to an existing checklist item.
Inside this tab of a checklist item there is an “add automation” button. When a user clicks this button, they are able to choose a specific library of checklist items to add.
You content manager (s) have build predefined automations for you as a rep to choose from and add to an existing checklist item.
You can always delete an automation within a checklist item by clicking the delete button to the right of the specific automation.
History: This tab shows you a list of all the edits made inside this checklist item. For example, you can see that a specific user changed the status to working as a specific time and date. This tab also allows you to see the log of the automations initiating so you can better track how they are working inside the checklist item.
Related Modules
As you know, a workspace is made up of modules. Each module contains it’s own piece or several pieces of content. You may have a checklist item that is related to the content of a specific module inside the same workspace.
For example, if one of our checklist items were to schedule a meeting with a team member, a related module could direct the assignee of that checklist item to a module containing a calendar integration. This way a user can use the module to book the meeting and return to the checklist to complete that checklist item.

Clicking the name of this related module inside the checklist item will redirect the user to the specific module. A checklist item can have several related modules.
In order to relate a module to a checklist item, click the “link” button on the top right of the Related Modules section. Modules will only be available to select from in this list if the module is present on that workspace (published or unpublished). Click the select button to the right of the module you want to link to that specific checklist item.
Some related modules are not yet published. Reps are able to see these, as all reps have permissions to see unpublished modules. These related modules are not visible inside the checklist item for contacts until they are published. The modules also have to be published in a group that the contacts have access to in order to be visible under the related modules section.
Related Tasks
Tasks can be created throughout the platform wherever they are needed. They usually relate to a specific workspace. These can be used to link specifically to your checklist item to indicate additional tasks required to complete the checklist item.
For example, perhaps this checklist item is already assigned to someone. But before the checklist item can be completed, it needs approval from another team member. This is where you can create a related task for a rep or contact.

Clicking the name of this related task inside the checklist item will redirect the user to the detail view of the task inside task management.
In order to create a task related to a checklist item, click the “add” button at the top right of the Related Tasks section.
A checklist item can have several related tasks.
NOTE: Completing, cancelling, or deleting a related task does not affect the checklist item. This checklist item will still need to be completed, canceled, or deleted separately.
Commenting Inside Checklist Item
All users are able to comment on modules throughout the workspace. The feature of commenting inside a checklist item works similarly. Only these comments are specific to a checklist item and notifications regarding these comments are sent to certain people.
Notifications regarding these comments are only sent to the primary rep on the workspace and the assignee of the checklist item. But these comments are visible to all users who can see the checklist module.
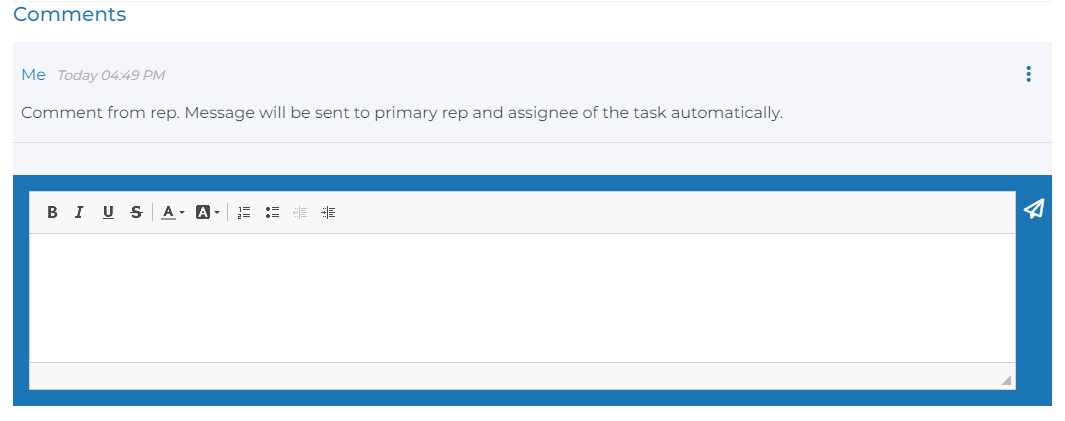
To add a new comment to a checklist item, click inside the white text box to leave your comment. Click the envelope icon to send the comment.
Comments can only be edited by their creator. But comments can be deleted by any rep.
Custom Fields
Custom fields are what we call customizable content elements inside a checklist item. There are many types of custom fields that are each representative of the specific type of content you are trying to include in your checklist item. For example: Sharing an image verses sharing a video or sharing a file verses sharing text.
There are two categories of custom fields: Display & Capture
Display: These fields are built to only display certain types of content. These are used when you want people involved with your checklist to not interact with, but just consume content. For example, you may want someone to watch an instructional video as part of a checklist item. You would add a video custom field from the display section.
Capture: These fields are used when you want to gather content from another participant of the checklist. For example, you may want someone to upload a document for other team members to review. You would add a File - Single File custom field from the capture section.
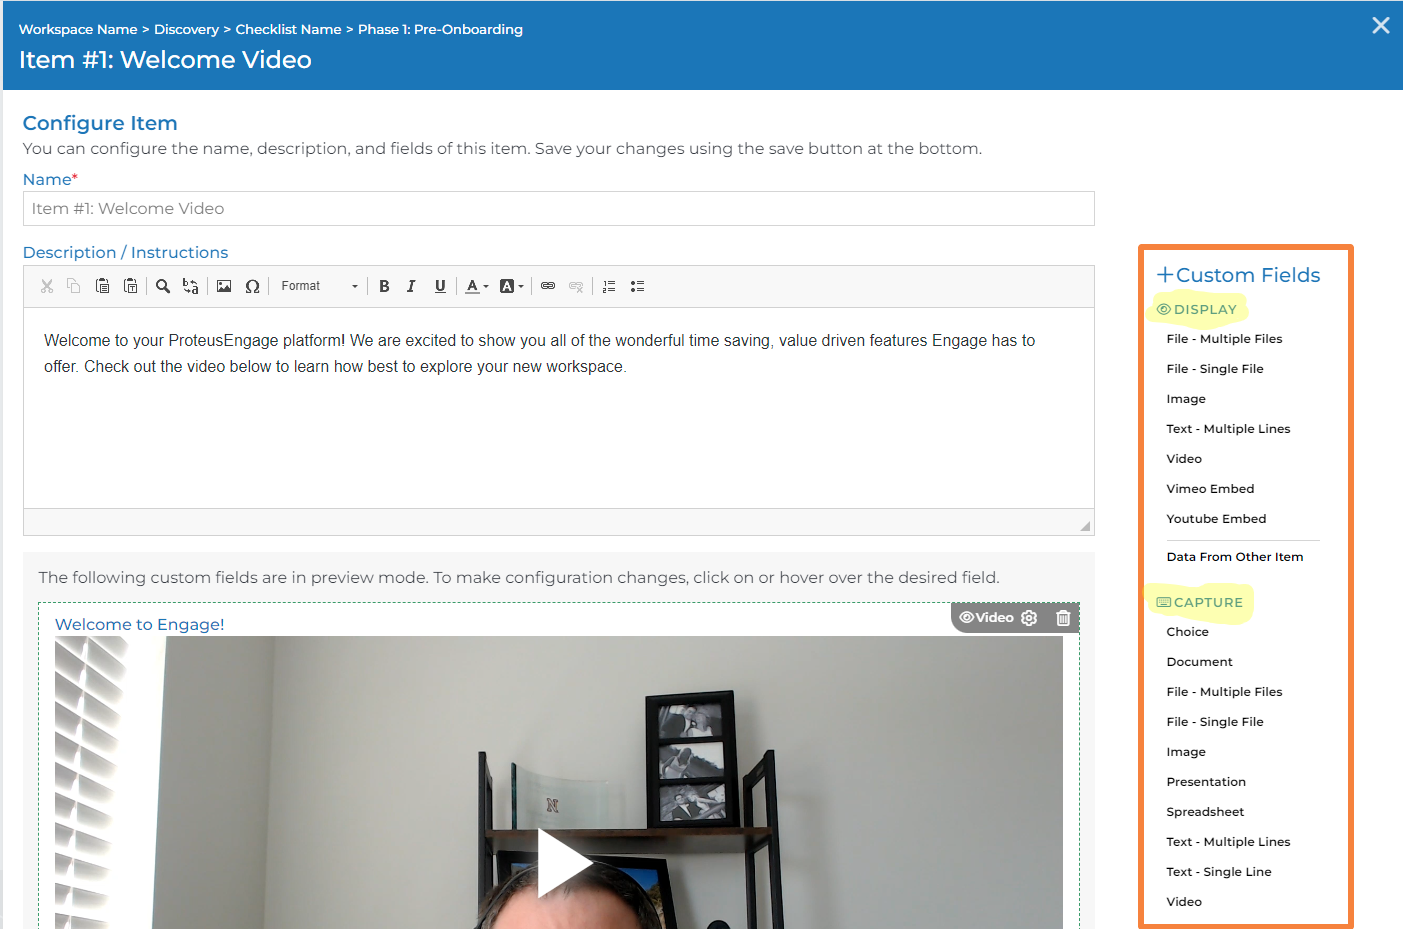
To add a custom field to a checklist item, open the configuration settings of a checklist item. You can do this by clicking the settings cog icon in the detail view of a checklist item.
Select one of the options from the side panel (shown above). Once selected, the settings options for the custom field will open. This is where you can give the field a name to better identify it later as well as add your intended content. If you accidently selected the wrong field, please delete and add the correct one. You can not change an existing field type to a different field type.
Add Checklist Items
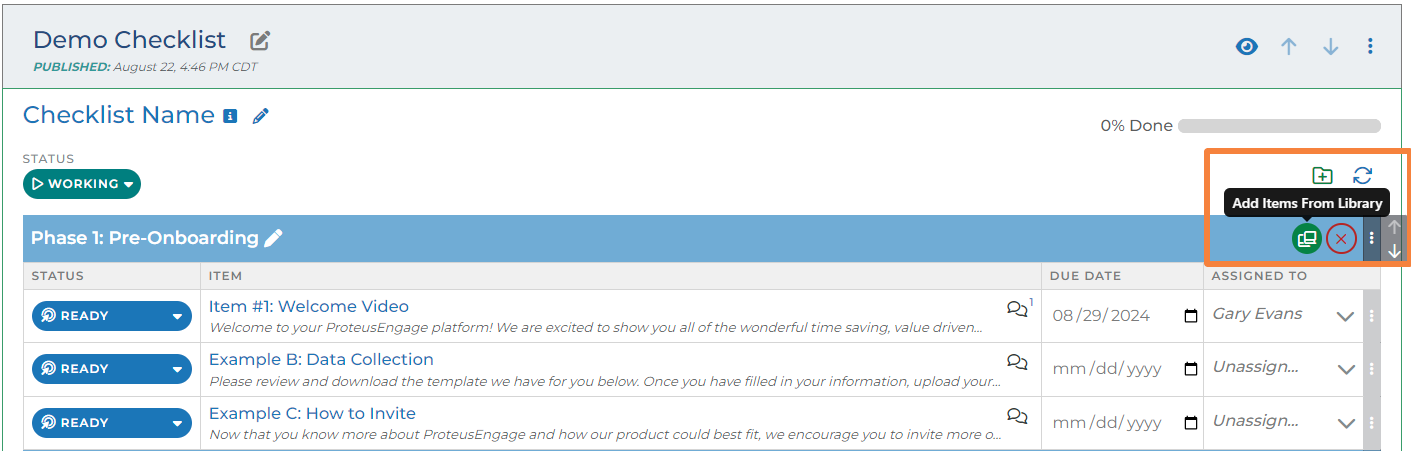
Reps can also create new checklist items to add to an existing checklist that is published on a workspace.
Inside each section of a checklist there is a “add items from library” button. When a user clicks this button, they are able to choose a specific library of checklist items to add.
You content manager (s) have build predefined checklist libraries that contain one or more checklist items for you as a rep to choose from and add to an existing checklist module.
Deleting Checklist/Items
If you want to delete a checklist item, you need to open the detail view of the checklist item. In the right side panel, there is an option to delete item.
Users can delete an entire section of a checklist by clicking the red 'X' located on the right side of each section within a checklist. The will delete all checklist items under that section.
When checklist items are deleted:
Any related tasks will be cancelled
Any related comments will be deleted
Any related modules will remain in their same location and state on the workspace