Checklist Automations
Automations are actions that happen automatically when triggered by specific conditions. For example, once a checklist item has been assigned, an automation can be triggered to send the assignee of that checklist item a notification to indicate what item they have to work on.
Automations are only added to checklist items. Each item can have many automations or none at all.
Your content managers have permissions to build automations and add them to checklist items in each checklist template.
Building Automations
Think of automations as a combination of cause and effect. Each automation starts with a trigger which causes an action to happen automatically as the effect.
Automation Triggers

Assignee Updated: Checklist items are unassigned by default. This trigger involves populating an assignee to a checklist item on a workspace.
Item Created: When a checklist module is added to a workspace, the checklist item is technically created. These checklist items are created regardless of the module’s publish state.
Status Changed: Both an overall checklist and each checklist item has a status when created. In this event, you can choose to trigger off of a checklist status or a checklist item status. Then you select which status will initiate your automation from a drop down list of our default statuses or custom statuses that your content manager has configured for you.
System Status Changed: Each of your install’s custom statuses are mapped to one of our system statuses. For example, you could have many different custom statuses (working, in review, ect.) that all translate to our system status of In Progress. So you may want this automation to cover all of those custom statuses instead of just one.
Multiple Triggers: You may want to use a combination of the trigger options mentioned above. This trigger allows you to do that. Any combinations of triggers you add here all have to be true in order for the automation to execute.
Workspace Event Occurred: The actions mentioned above are all related to actions that take place within a checklist. This trigger allows you to set your action based on several events that can take place on a workspace. Like when the status is updated or the labels of a workspace are populated.
Automation Conditions

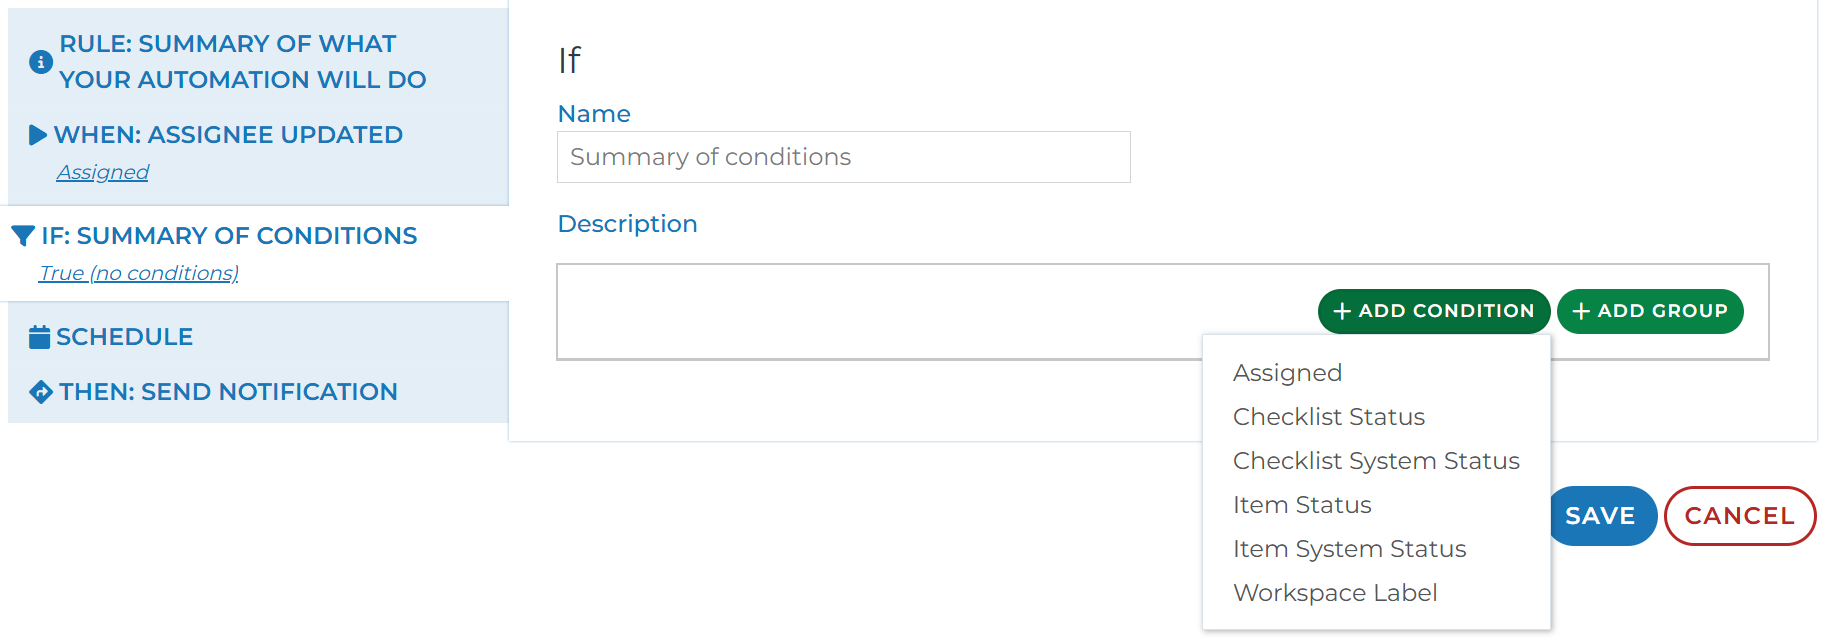
Conditions allow you to specify the exact circumstances under which an automation should be executed. They act as filters ensuring an automation only executes when certain criteria are met.
For example, you may not want your automation to run if the checklist item has been cancelled, the overall checklist has been cancelled, or the workspace is in a closed state.
Your options for conditions are whether the checklist item is assigned, your checklist or checklist item statuses, and workspace labels. You can add conditions separately or group your conditions to specific whether all conditions should be true or any of the conditions can be true in order to execute the automation.
If you populate no conditions, the automation will continue when triggered.
Automation Schedules

The schedule section of an automation allows you to choose when the specified automation action will happen. You can add a schedule based on two elements:
(1) Before or after the due date of a checklist item
For example, you may want to send the assignee of a checklist item a reminder to complete the item 2 days before the due date to help keep the project on track.
(2) A certain date or days after the automation is triggered
For a relative schedule you'll pick the number of days and/or hours to schedule after triggered. For example, you may want to wait until an optimal time of the business work day for your automation to run so the action is well received.
For a calendar schedule you'll pick the day of week, the week of month, etc, after triggered. For example, if your leadership meeting is the first Wednesday of the month, you can ensure this automation will comply with that schedule.
Automation Actions

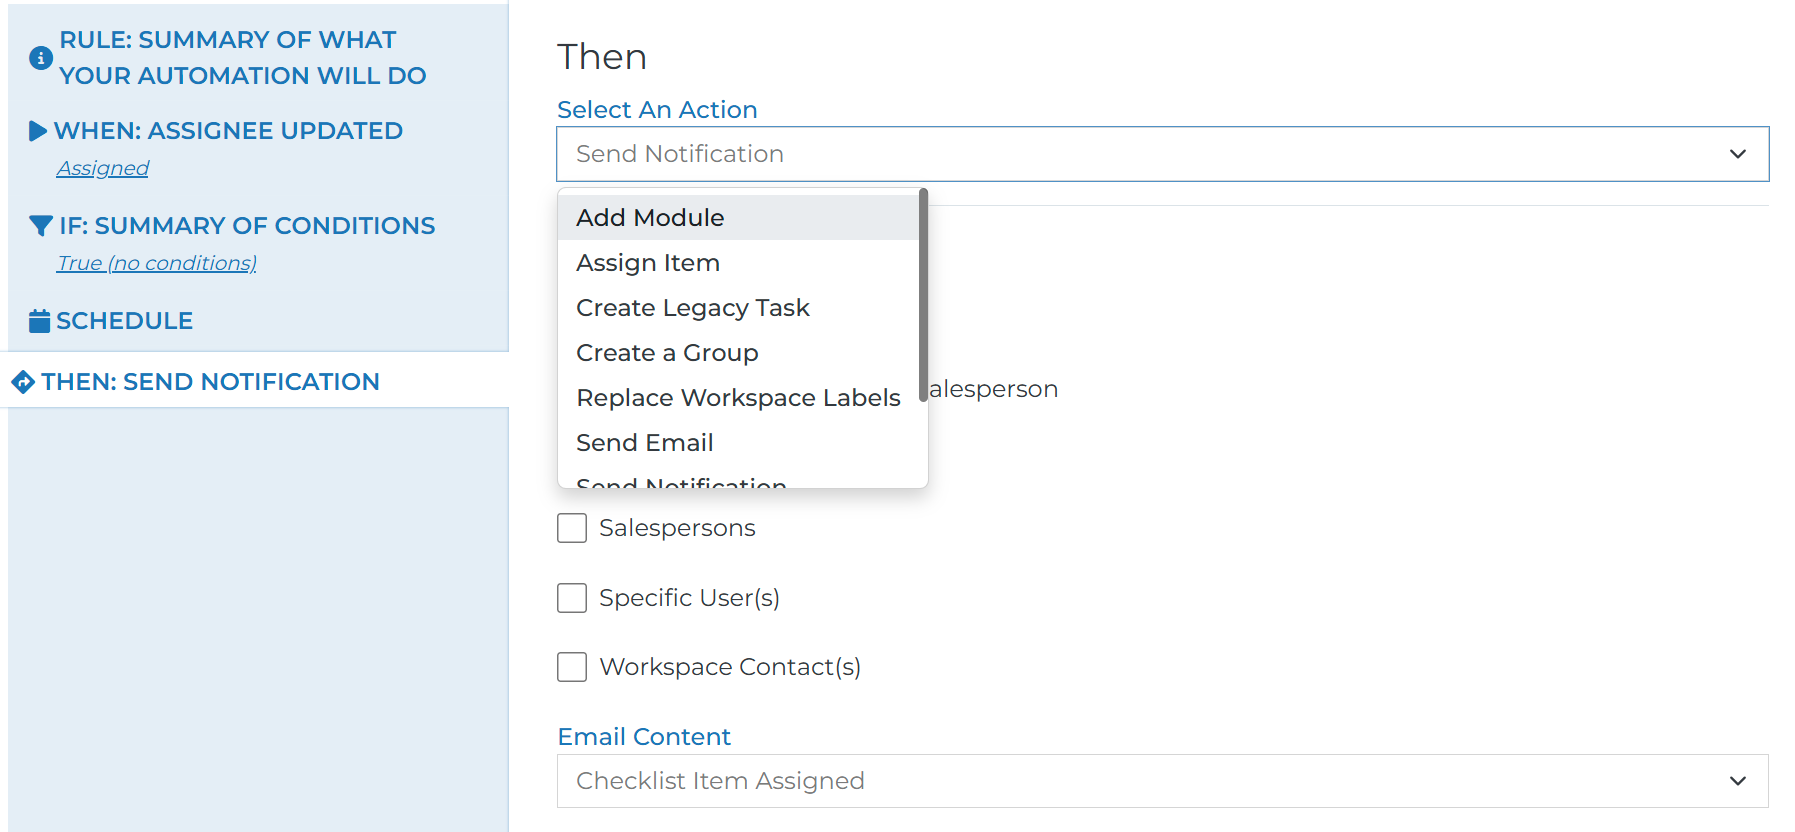
Now that you understand the triggers that cause an automaton to be initiated, it’s time to configure the action that will take place based on those triggers. Here are the action options:
Add Module: This action pulls a list of module sin your module library for you to choose from. Whichever module you choose will be added to the general group by default or you can choose the specific group the module should be added to. You also have options to send notifications to members of the workspace to encourage them to view this module.
This option also includes a manual review setting options of Yes, Yes - Legacy Task, or No
If you choose “Yes,” the module you specified will not be published until it is reviewed by someone on the workspace and manually pushed. Once executed, these automations will be listed in the Item Processes section of a checklist item detail page. Each one must be processed in order for the automation to take place.
If you choose “Yes - Legacy Task,” a notification email is sent to the primary rep of the workspace indicating there is a task to review this module before it is published. The primary rep then must complete this task in order for the module to be published. It is not recommended to use this option unless the option above does not fit your needs.
If you choose “No,” this module will be automatically added to the specified group in whatever publish state you configure without having to be approved like in the options detailed above.
Assign Item: This action will allow you to choose who should be added as the assignee of a checklist item. You are not able to choose specific users here as this automation could be executed on any workspace with any number of workspace members. Instead, you can choose between the primary salesperson, salespersons based on role, or workspace contacts based on labels.
Keep in mind that a checklist item can only have one assignee at a time. So if you do decide to choose the Salespersons or Workspace Contact (s) options, ensure that this will ultimately end up being one person. For example, if your workspace only has one contact with a certain label or the group containing your checklist only has one salesperson as a participant.
Create Legacy Task: This action creates a general task that you can customize.
You choose the task summary and any notes that help give context to the task.
You choose what the due date of the task will be once created
You will choose who should be assigned that task. The assignee will receive a notification alerting them that this task has been assigned to them.
As with the Assign Item action above, these tasks can only have one assignee at a time. So ensure your selection matches that expectation. If your option translates to multiple people, we will randomly choose one of those people to be the assignee.
Create a Group: This action will automatically create a group on whatever workspace the checklist item containing the automation belongs to. You choose the group name, group members, whether or not the group should be in a folder, and its position related to other groups or folders.
If the workspace already contains a group with the same name, the automation will fail. Type your group names carefully and ensure they coincide with your company’s default workspace groups.
Replace Workspace Labels: If you company has workspace labels configured, you can choose to automatically modify those labels. You choose the label type (domain) and then choose which label options should be selected as the action.
Send Email: This action is a customizable email. You choose who the email comes from, who will be sent the email, the subject line, and the content of the email.
This option also includes a manual review setting options of Yes, Yes - Legacy Task, or No. These are explained in the “Add Module” action above. They work the same way for this action.
Send Notification: Our system has pre-build notification emails that you can send. Each of these email content options contains a hyperlink to the specific checklist item this automation is added to. You should choose the email content based on the trigger you have chosen.
Trigger Event:
Update Workspace Status: Each workspace inside your Engage install must have a status. This action allows the existing status of your workspace to be updated to a different status. You will see the list of your previously configured custom statuses in the drop down as options to choose from.
Default Automations
Each Engage install comes with a list of pre-built automations that cover some of the basic use cases:
(1) When an assignee is updated inside a checklist item, that assignee receives a notification indicating that a checklist item has been assigned to them.
(2) When the system status of a checklist item is changed to Completed, a notification is sent to the primary rep on the workspace to alert them on the completed item.
(3) As noted above, each checklist item is unassigned by default and has a blank due date. In order to reduce manual work by your team, you can build automations to auto populate assignees and due dates.
You may have a checklist template where you have several items that will always be assigned to the primary rep of that workspace. As a result, you can create an automation that states when a checklist item is created, assign this item to the primary rep. Then you can add this automation to specific items in your checklist template where the primary rep should be assigned by default.
Using Automations
Your content managers have permissions to manage your organization’s checklist templates which is where they can add automations to checklist items within each template. This ensures that those common automations will always be running in the background without further configuration from the rep user.
Once a checklist is on a workspace, rep users can see which automations have been added to a checklist item by opening the checklist item on a workspace and clicking the “Automations” tab.

This tab is also where rep users can add automations themselves from a list of library automations that includes our default automations as well as automations your content manager has configured. Once the automation is added, reps can also edit this automation. They can not edit what triggers the automation, the conditions, the schedule, or the specific action. But they can edit the options within that action.
For example, if one of your library automations is configured to send an email notification to the checklist item assignee, a rep could change the recipient of this notification to be someone different or simply include more people to receive the notification.
