
Engage Terminology
This article will help explain those pieces of terminology that make up the Engage platform so you can better understand what they mean and how they are used.
Workspace
A workspace is a dedicated environment used to communicate and collaborate information between two entities. These entities can be individuals or highly complex organizations with several different participants. Workspaces can be used to share documents, insights, and images, as well as share out information through templated formats.
Some may refer to this as a personalized feed or website. The interaction with the content is transactional, but delivered in a conversational approach. The recipient of the content is drawn to the environment with the delivery of new information, and the entire history or relationship will remain within the environment which can change through the utilization of groups as the relationship or status evolves.
Workspaces are often used to share content with a Prospect or Client but can also be used for Recruits, New Hires or a group of people working together on a project or task force. To learn more about Workspaces, here are some articles to help:
Modules
Modules are what we call pieces of content that are created, edited and shared across a workspace. Each module can contain one or more pieces of content.
Modules are managed by your content managers and utilized by your reps on a workspace via a Module Menu.
Each new Engage client is equipped with a list of default modules. These modules are based on the most commonly shared content. These default modules also contain sample content so you can see what the module will look like before you start putting in real content. To learn more about Modules, here are some articles to help:
Components
A component is what we use to display an individual piece of content. Modules are made up of components. Some modules have only one component, while other modules can have a combination of components.
For example, you can have one modules that contains only a video. A video is one component. You could also have a module that contains several components. For example, a module that contains a video, a checklist, and file sharing. This module would have three components.
There are several component types. The type of component depends on the content you want to display. For example, you would need a media component in order to display a video. You would want a link component to share a link to a blog post within a module. To learn more about all the different component types and how they are used, review this article: Components
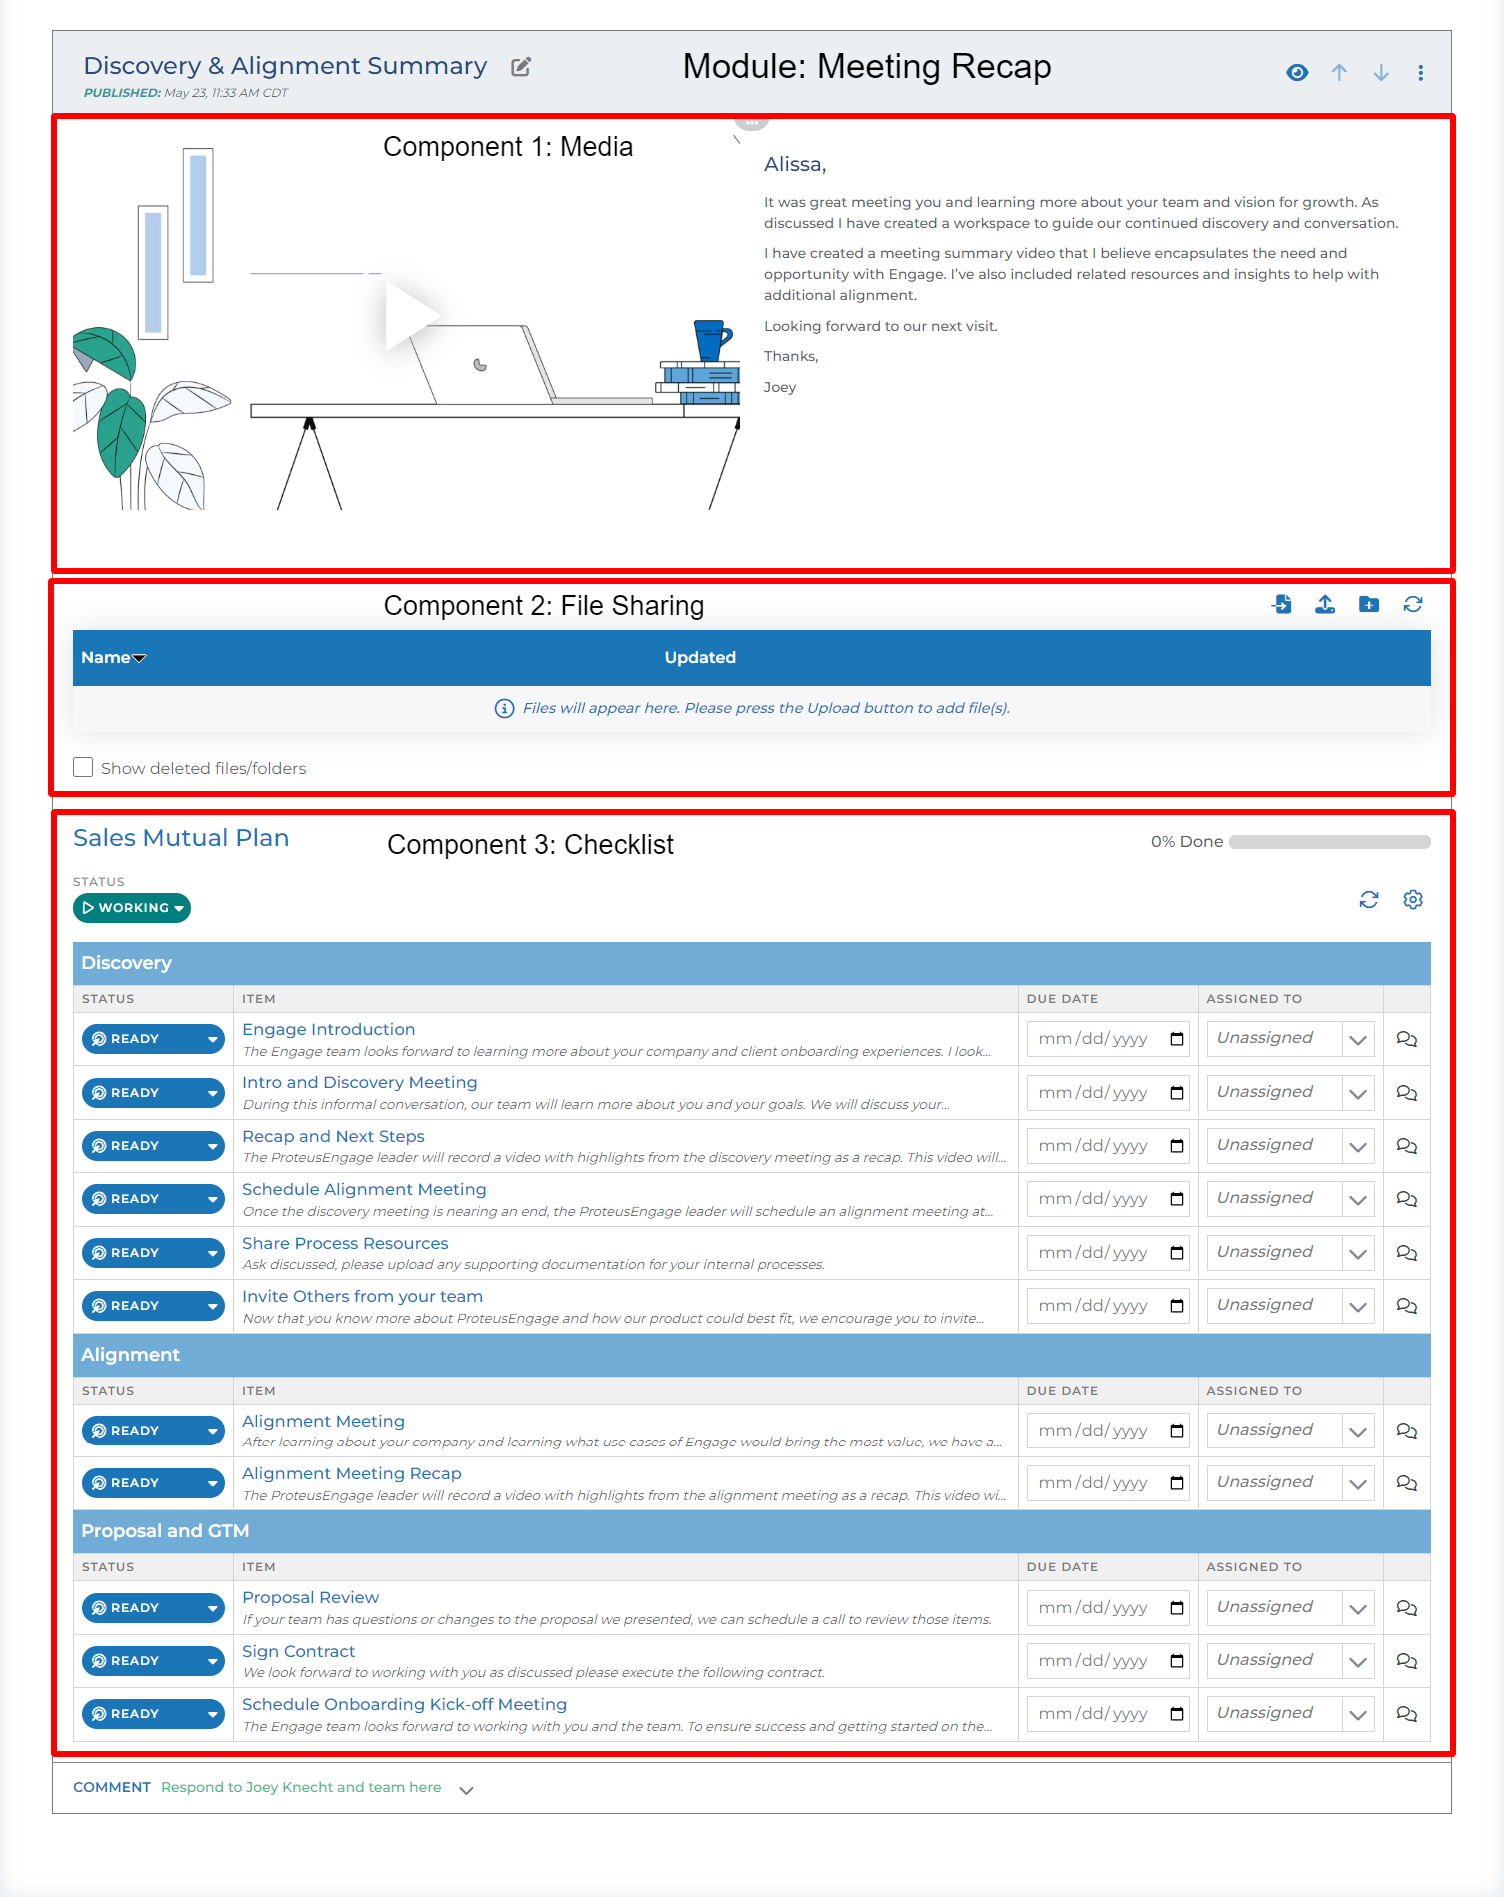
Example of a module with multiple components
Reps
Reps are what we call your internal team members. This is anyone who has an active user login for their Engage site. These users can have access to different sections of the platform. These are often represented in the “Our Team” section of a workspace.
These reps are listed in alphabetical order according to their name. Expect the primary rep who is always listed first.
Primary Rep: Indicated by a colored flag above their user under the Our Team section of the People tab of a workspace. Only one user can have this role per workspace. If there is only one user on the workspace, that user will be the primary by default.

Contacts & Reps on a workspace
Contacts
Contacts are people outside your organization that have been invited to view and collaborate on a specific workspace. These people have no login credentials (unless the workspace is locked). They have a personal link that opens the workspace.
Note: This personal link can technically be accessed by anyone when shared. So it is important that only the person connected to that contact record should view the workspace using their link.
Contacts can be added to a workspace by reps in the People tab of their rep view or by other contacts in their live view.
Rep View
This refers to the configuration side of a workspace that only reps have access to. This is also sometimes referred to as “edit view” due to all the configuration options available.
The most popular use of edit view is adding and editing modules and their content. Each group has it’s own content pieces in the form of modules. To learn more about adding and editing modules, please review this article: Customizing or Editing a Module
Reps can also edit the name, status, and access level of a workspace via the top banner.
Each workspace contains several navigation tabs. Reps have access to all these tabs and can manage content in each of these. These include:
Details: Reps can see each individual activity that has taken place on a workspace.
Analytics: Reps can access engagement and activity reports to summarize the impact of a workspace
Files: Reps can add, edit and organize any files inside the workspace.
Checklists: Reps can see a summary listing of all checklists, review their status/progress, and make changes if needed
People: Reps can add any contacts or internal team members to collaborate on the workspace
Tasks: Reps can see and manage all tasks associated with this workspace
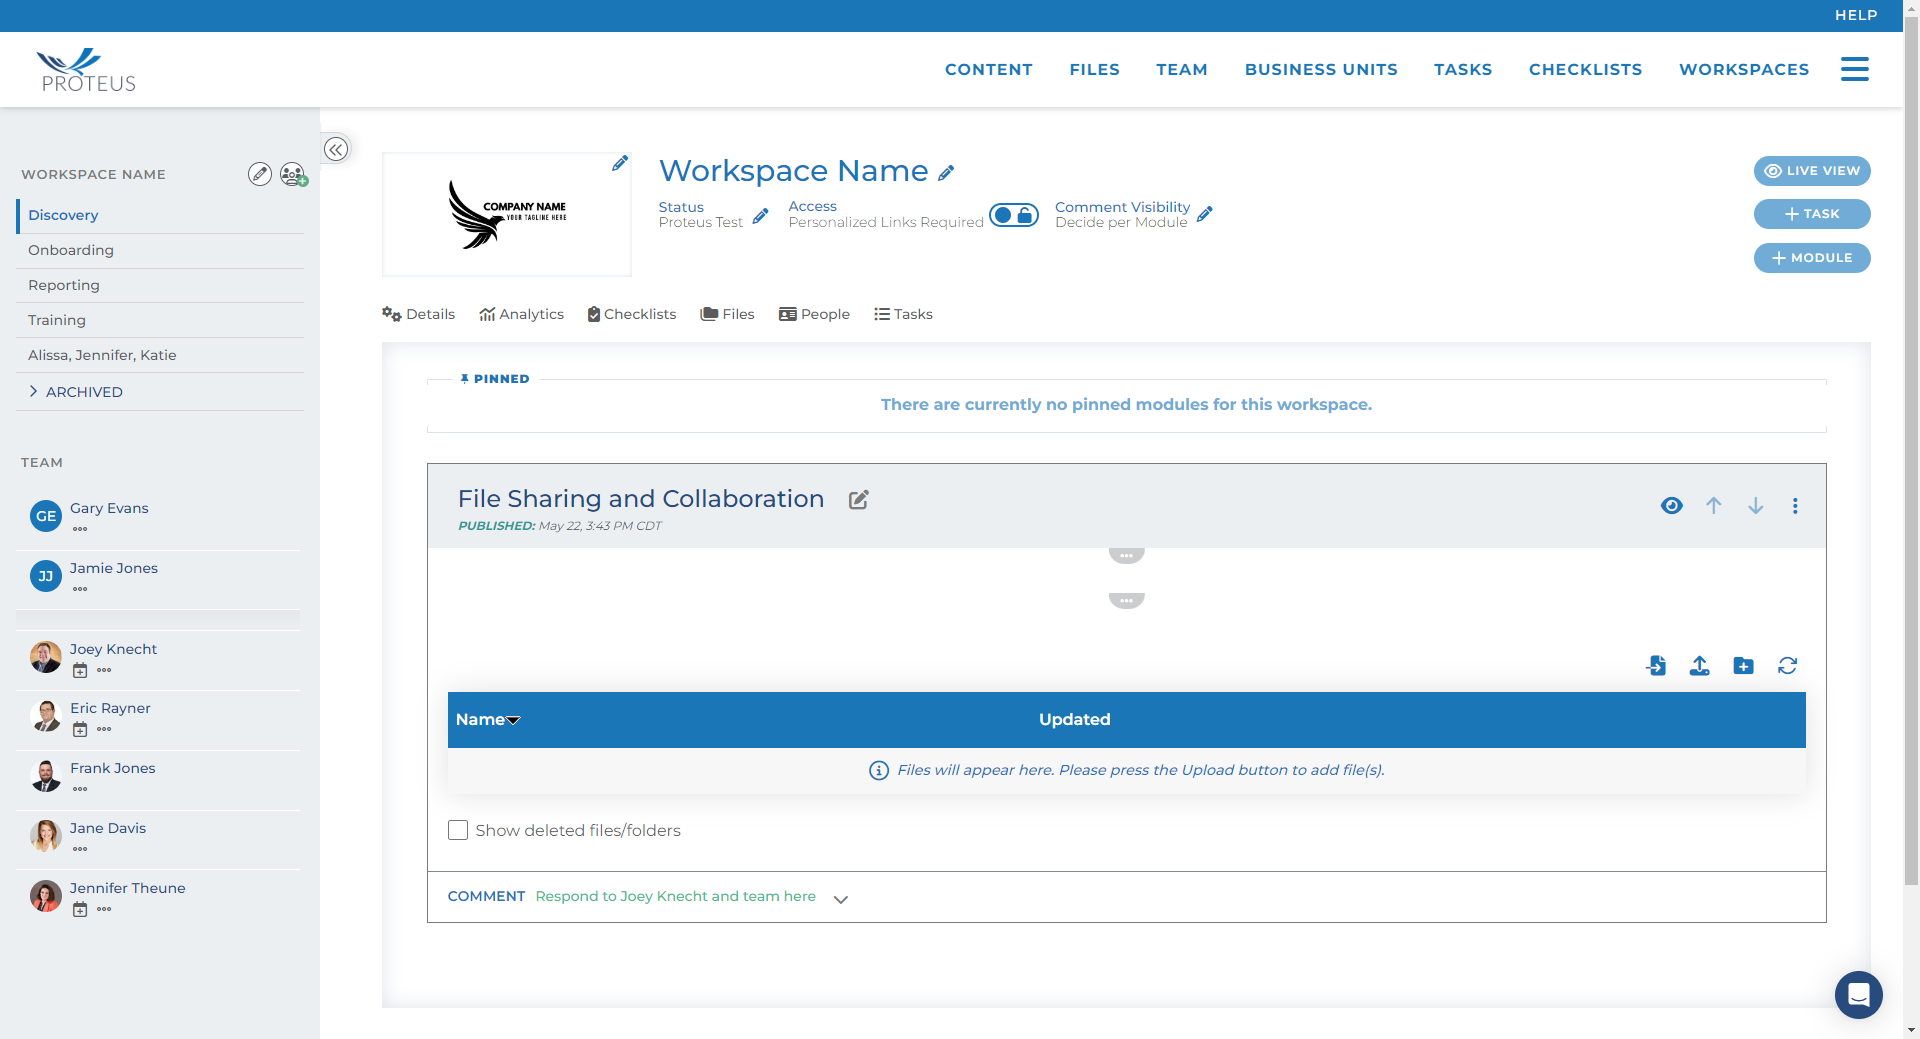
A rep’s rep (edit) view
Live View
This refers to the view of a workspace from a contact’s perspective. Contacts can only see modules that are published and groups that they are part of.
Contacts can see any tasks assigned to them as well as assign new tasks to any rep or contact on the workspace.
Contacts can comment on any visible module and share the content of these modules with existing contacts/reps on the workspace or invite a new contact to the workspace
Contacts also have the ability to utilize the “I want to” menu of their live view. Using these tools, a contact can share links/files, ask questions, or search for content inside the workspace.
Reps have a “live view” button inside their rep view that allows them to preview what a contact sees to make any necessary edits or changes.
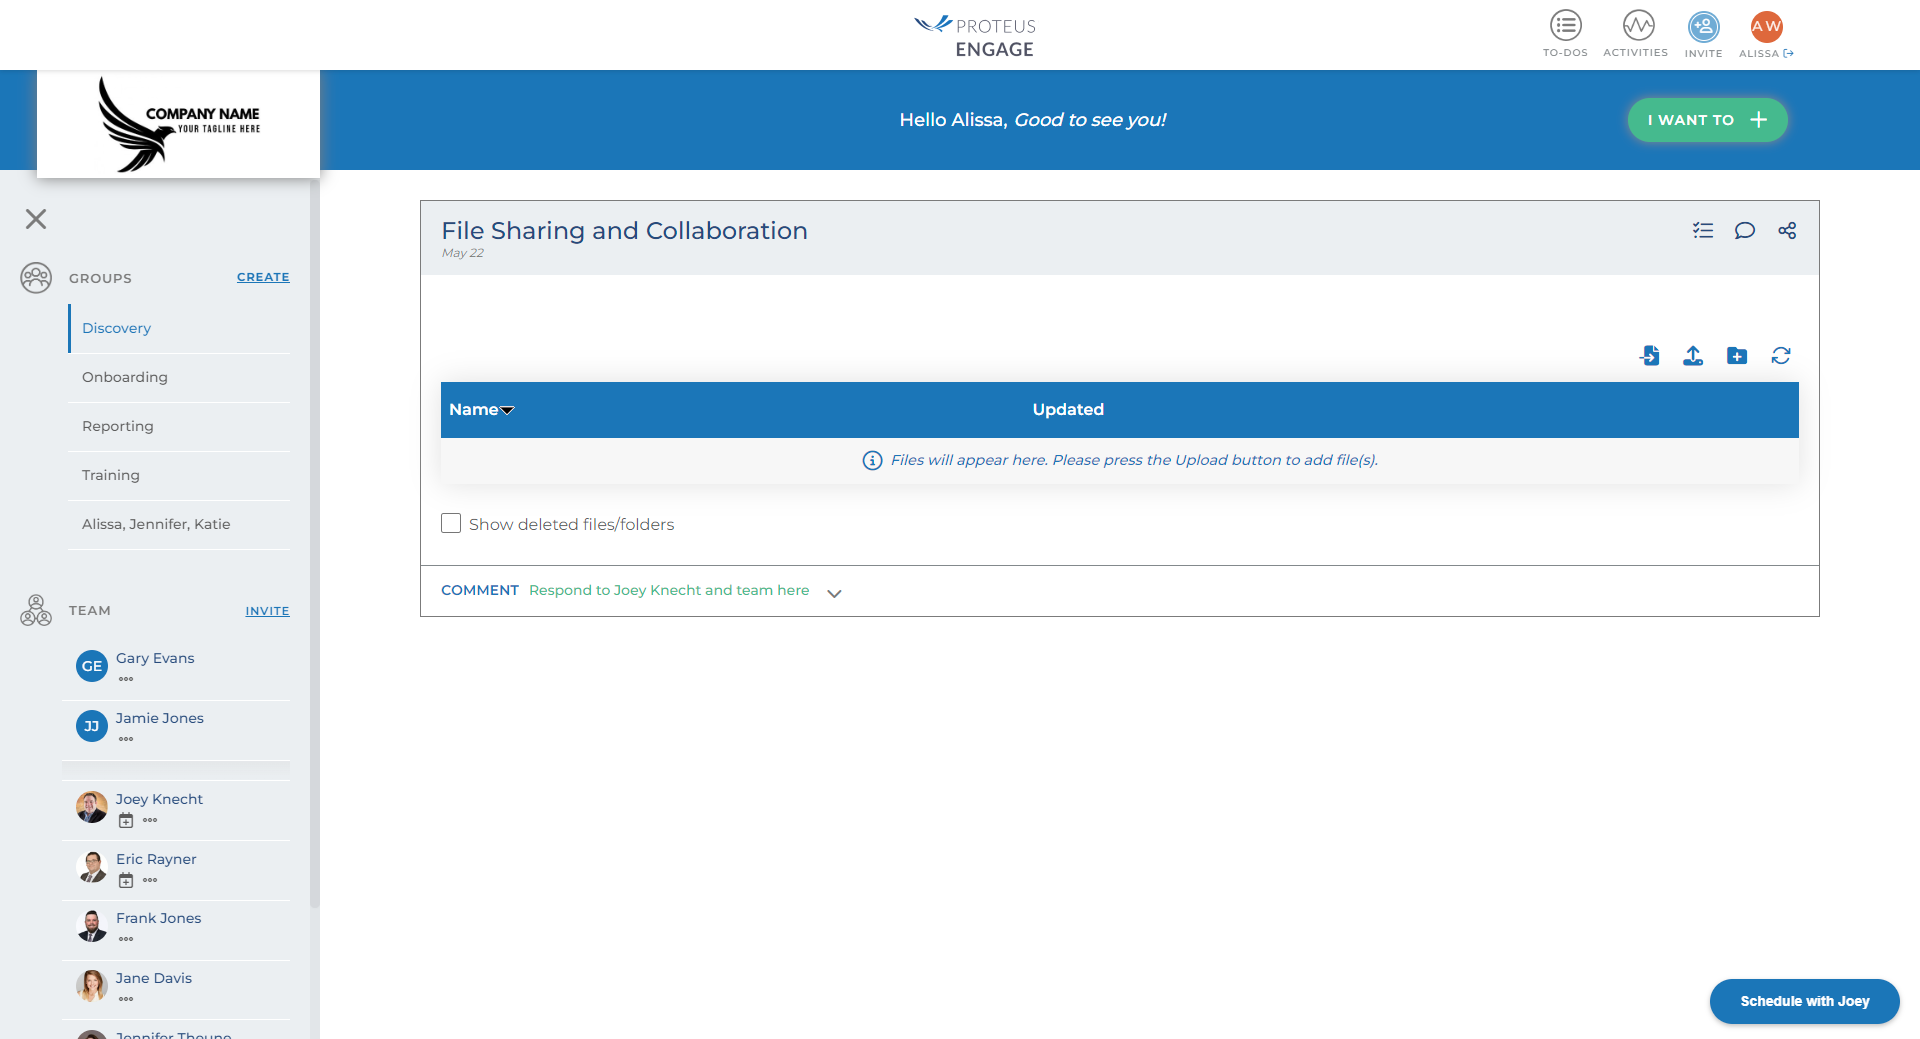
A contact’s live view
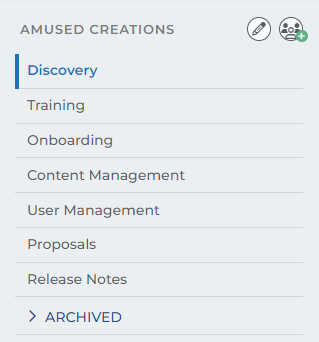
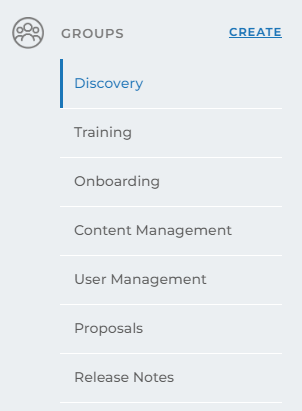
Groups
You have been invited to, and most likely experienced the workspace environment as well as contact groups. For example, if you are seeing this file via the Engage platform, you are in the ‘Onboarding’ Group within the workspace.
Groups are visible based on membership. Because of this, not all contacts in your organization will have access to this group and the materials shared within.
We will use a Group called ‘Training’ for Users within your organization that will be responsible for creating and managing workspaces. Another group called ‘User Administrators’ will be used to communicate relevant information to parties that can add and manage seats.
A contact may be a member of several groups at any given time, and membership can be driven via intelligent automations or permitted manually on case-by-case basis.
Example of Groups: Rep View
Example of Groups: Live View
How to Use Groups
Groups can be used a multitude of ways. Some installations have groups configured for different stages of a process, such as the previous example with onboarding and training.
Another scenario of groups could be the type of information contained within the group – such as contracts and statements of work or quarterly reports. Groups can also be used for private communication – such as internal only, or legal.
The way contacts are invited to groups will vary depending on your unique needs and business rules. Contacts can be added to the groups automatically based on “labels” such as persona or role but membership can also be managed manually and by several different parties in the workspace. These topics will be discussed in your initial configuration calls with your dedicated Customer Success Manager and new logic to introduce groups can be configured at any time.
All workspaces begin with an initial group called “General” which every contact and internal user that can access the workspace is able to see. Additional groups are not necessary but are recommended when several different audience types or a significant amount of content will be shared over the lifetime of the workspace.
To learn more about how to add groups, you can review this article: Groups
Workspace Labels
Workspace Labels can be used to segment your workspaces. This will aid in reporting and targeting content delivery.
Workspace Labels can be conditional. Different departments within your organization may use different labeling and the labels used in searching and reporting can vary by department or Business Unit.
Additionally, labels can have conditional sub-labels.
For example, in the image provided, the options available in the “Model” list could be driven by the Persona selected.
To add workspace labels to your Engage site, submit a request to ProteusEngage Support.

Example: Workspace Labels
Contact Labels
Much like Workspace labels, contact labels are configurable and can be used to identify your audience and segment them if desired.
Contact labels can be pulled into Engage via a CRM integration and can be used for automations.
For example, a contact label called Engage User could automatically invite a contact into the Training group shown on the previous screen. Another example would be to create a task for the “ Decision Maker” after a Proposal is shared in the Proposals group.
To add contact labels to your Engage site, submit a request to ProteusEngage Support.
Example: Contact Labels
Business Units
Business Units are a way of organizing workspaces into certain categories to better customize content and/or user access.
Example Use Case: Your company sells multiple products. Some products are only available at certain locations. Therefore, each location would be added as a business unit. Workspaces under “Location A” would feature content and people specific to that location. This would help to consolidate all your company info and put it to work where it counts automatically.
Rep users can have visibility and editing abilities to workspaces and content within their assigned Business Unit.
To learn more about how to create and configure Business Units, check out this article.