
Contact Status Defined and How to Edit
Your Engage contacts can have one of three statuses to help with contact management and organization. They are:
Pending: Contacts that you need to review before turning to Active or Inactive (*).
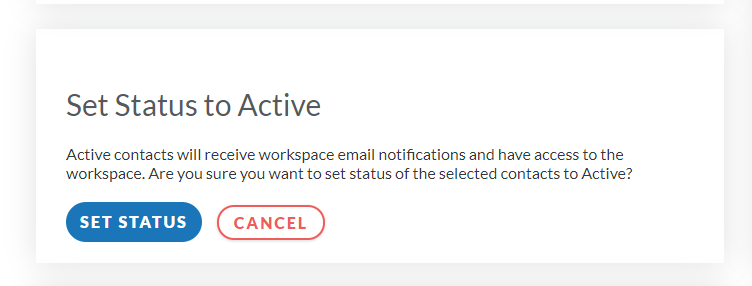
Active: Contacts that you would like to have access to the workspace (these contacts will still need to be invited to access the workspace).
Inactive: Contacts that do not need access to the workspace at this time because they are no longer with the organization, deal, or other reason.
(*) The Pending status is often used in conjunction with CRM integration. If your Engage platform is integrated to a CRM, and you create a workspace directly from your CRM, contacts can come over as Pending. Contact your Client Success Manager to discuss the default initial status of a synced contact.
A contact set to Pending means they are in a holding pattern. They will appear on your workspace detail and analytics page, but will not be invited to the workspace or receive emails while in the Pending status. Pending contacts will not receive workspace email notifications or have access to the workspace. You should review your pending contacts and decide if they should be moved to either active or inactive. Active means you intend for them to have access to the workspace; inactive means you do not need them to have access to the workspace. Keep in mind, if you mark a contact inactive, it's only marked as such in Engage and does not impact your CRM. In addition, you can always change a contact status and move from Pending/Active/Inactive at any point in time. (See FAQ below.)
Changing from Pending to Active or Inactive
You have two methods available to make this change: Bulk or Individually.
Option 1: Bulk actions
Great for initial use as it's quick and efficient and many can be done at once.
- When you're on a workspace detail and analytics page, on the contact card you will notice a square box just to the left of each contact's name. Select all the contacts you want to change to a specific status. (Hint: You can use the Select All button at the bottom of the Contacts box to choose everyone in the list and then just uncheck those that do not apply) Example: Choose everyone who you want to set to inactive.
- When you've selected all of the contacts you need, scroll to the bottom of the list of contacts and in the drop-down labeled Bulk Actions select "Set status to inactive".


Option #2: Individual action
Great for changing one contact at a time.
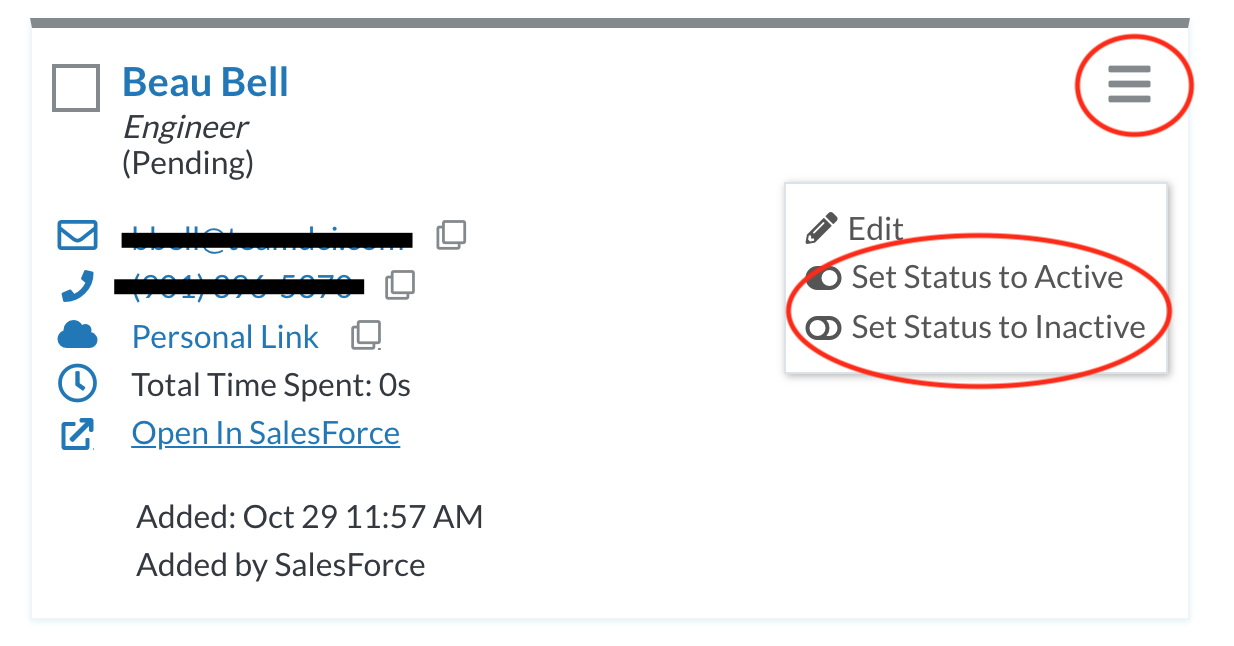
- When viewing the workspace detail and analytics page, on the upper right corner of the contact card you will notice three horizontal lines, also known as a hamburger menu. Click the lines and select either "Set Status to Active" to set the contact to Active and allowing access to the workspace -or- "Set Status to Inactive" to set the contact to Inactive.
FAQ:
I previously marked a contact as Inactive. Now I need to give them access again. How do I get them back/set as Active?
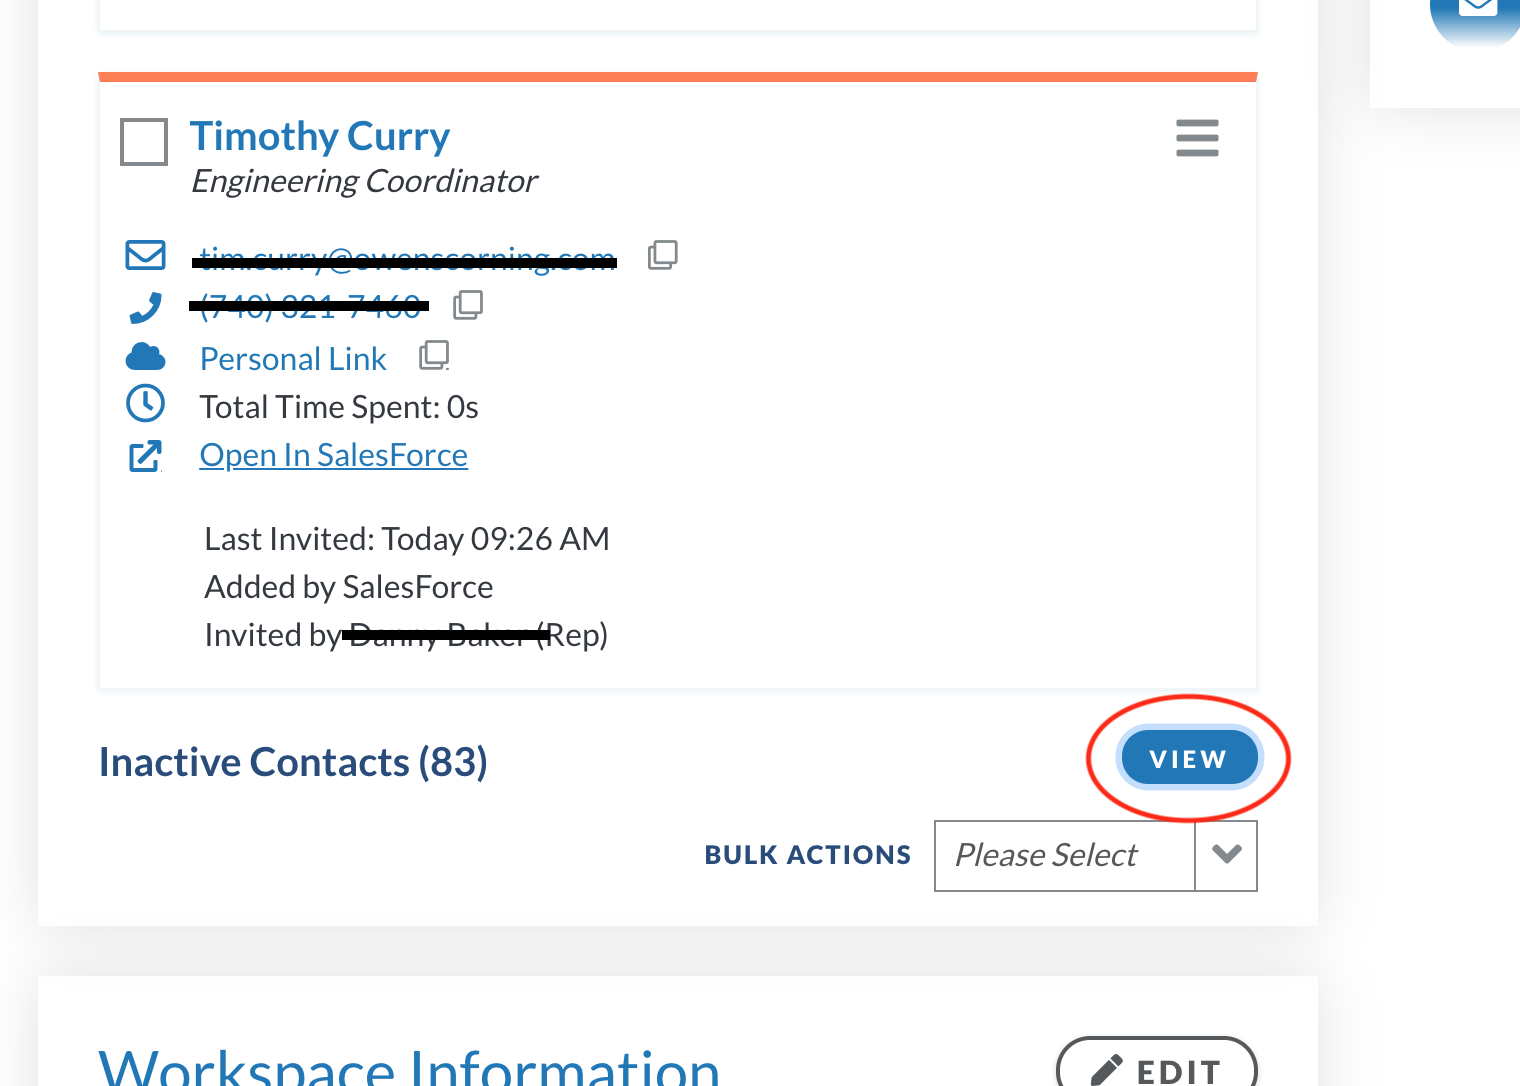
From the workspace detail and analytics page, scroll to the bottom of the contacts area and find the "View" button to expand the Inactive Contacts list. Then simply select the box to the left of each contact you would like to make active.
You will be asked to confirm your choice and need to click "Set Status" to confirm.
Questions? Please click the "HELP?" button in the upper right corner of your Engage screen or contact support.