
Salesforce: Integration Step By Step Instructions
SalesForce Integration Setup
This is an outline of the steps required to enable the integration between Engage and Salesforce. The integration process is usually completed by a member of the Proteus team being put in touch with someone in your organization who has a Salesforce Administrator user account. Then the connection can either be completed together on a call or via e-mail.
Items to Consider
- The Engage Salesforce integration is only available for Salesforce instances that have API access. Here are two articles from Salesforce to help you know which editions have API access and how to know which edition your organization has.
- Does the Salesforce Org have Lightning Experience enabled? These steps assume so; otherwise, the integration will be done differently (no custom component in Salesforce). Please contact engage@proteus.co directly.
- When Engage uses the Salesforce API, it will be operating as the SalesForce user account that was used to authorize ProteusEngage as a “Connected App”. The user that completes the /admin/sfa-setup setup is the relevant user.
- There are separate instructions for setting up SAML SSO using Salesforce as the identity provider here.
One Day Before the Call (or earlier)
- The ProteusEngage Lightning Web Components requires the Salesforce organization to be configured with a custom domain. The custom domain setup process takes time to complete. (Up to 12 hours.) It is a two-step process: https://help.salesforce.com/articleView?id=domain_name_overview.htm&type=5
During Call
- (If applicable) Install the ProteusEngage Salesforce Package that includes our LWC component to provide the "Add Workspace" and "View Workspace" buttons. User with Salesforce admin access clicks this link:
- Production Org: https://login.salesforce.com/packaging/installPackage.apexp?p0=04t3k0000027BfH (version 1.2)
- Sandbox Org: https://test.salesforce.com/packaging/installPackage.apexp?p0=04t3k0000027BfH (version 1.2)
- (If applicable) Install the ProteusEngage Salesforce Package that includes our LWC components to embed the Workspace UIs in Salesforce. (Note: If upgrading to 1.1 from 1.0 to get additional components, please update the Canvas app url to
https://CompanyName.proteusengage.co/sfa/canvas. A user with Salesforce admin access can click the link:
- Production Org: https://login.salesforce.com/packaging/installPackage.apexp?p0=04t3k0000023Da7&isdtp=p1 (version 1.1)
- Sandbox Org: https://test.salesforce.com/packaging/installPackage.apexp?p0=04t3k0000023Da7&isdtp=p1 (version 1.1)
- Create a Connected App
- Click on App Manager
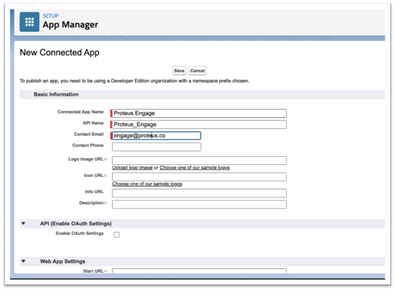
- Click Create a New Connected App (see Screenshot 1)
- Enter ProteusEngage as the app name and API name (see Screenshot 1)
- Enter engage@proteus.co for the Connected email (see Screenshot 1)
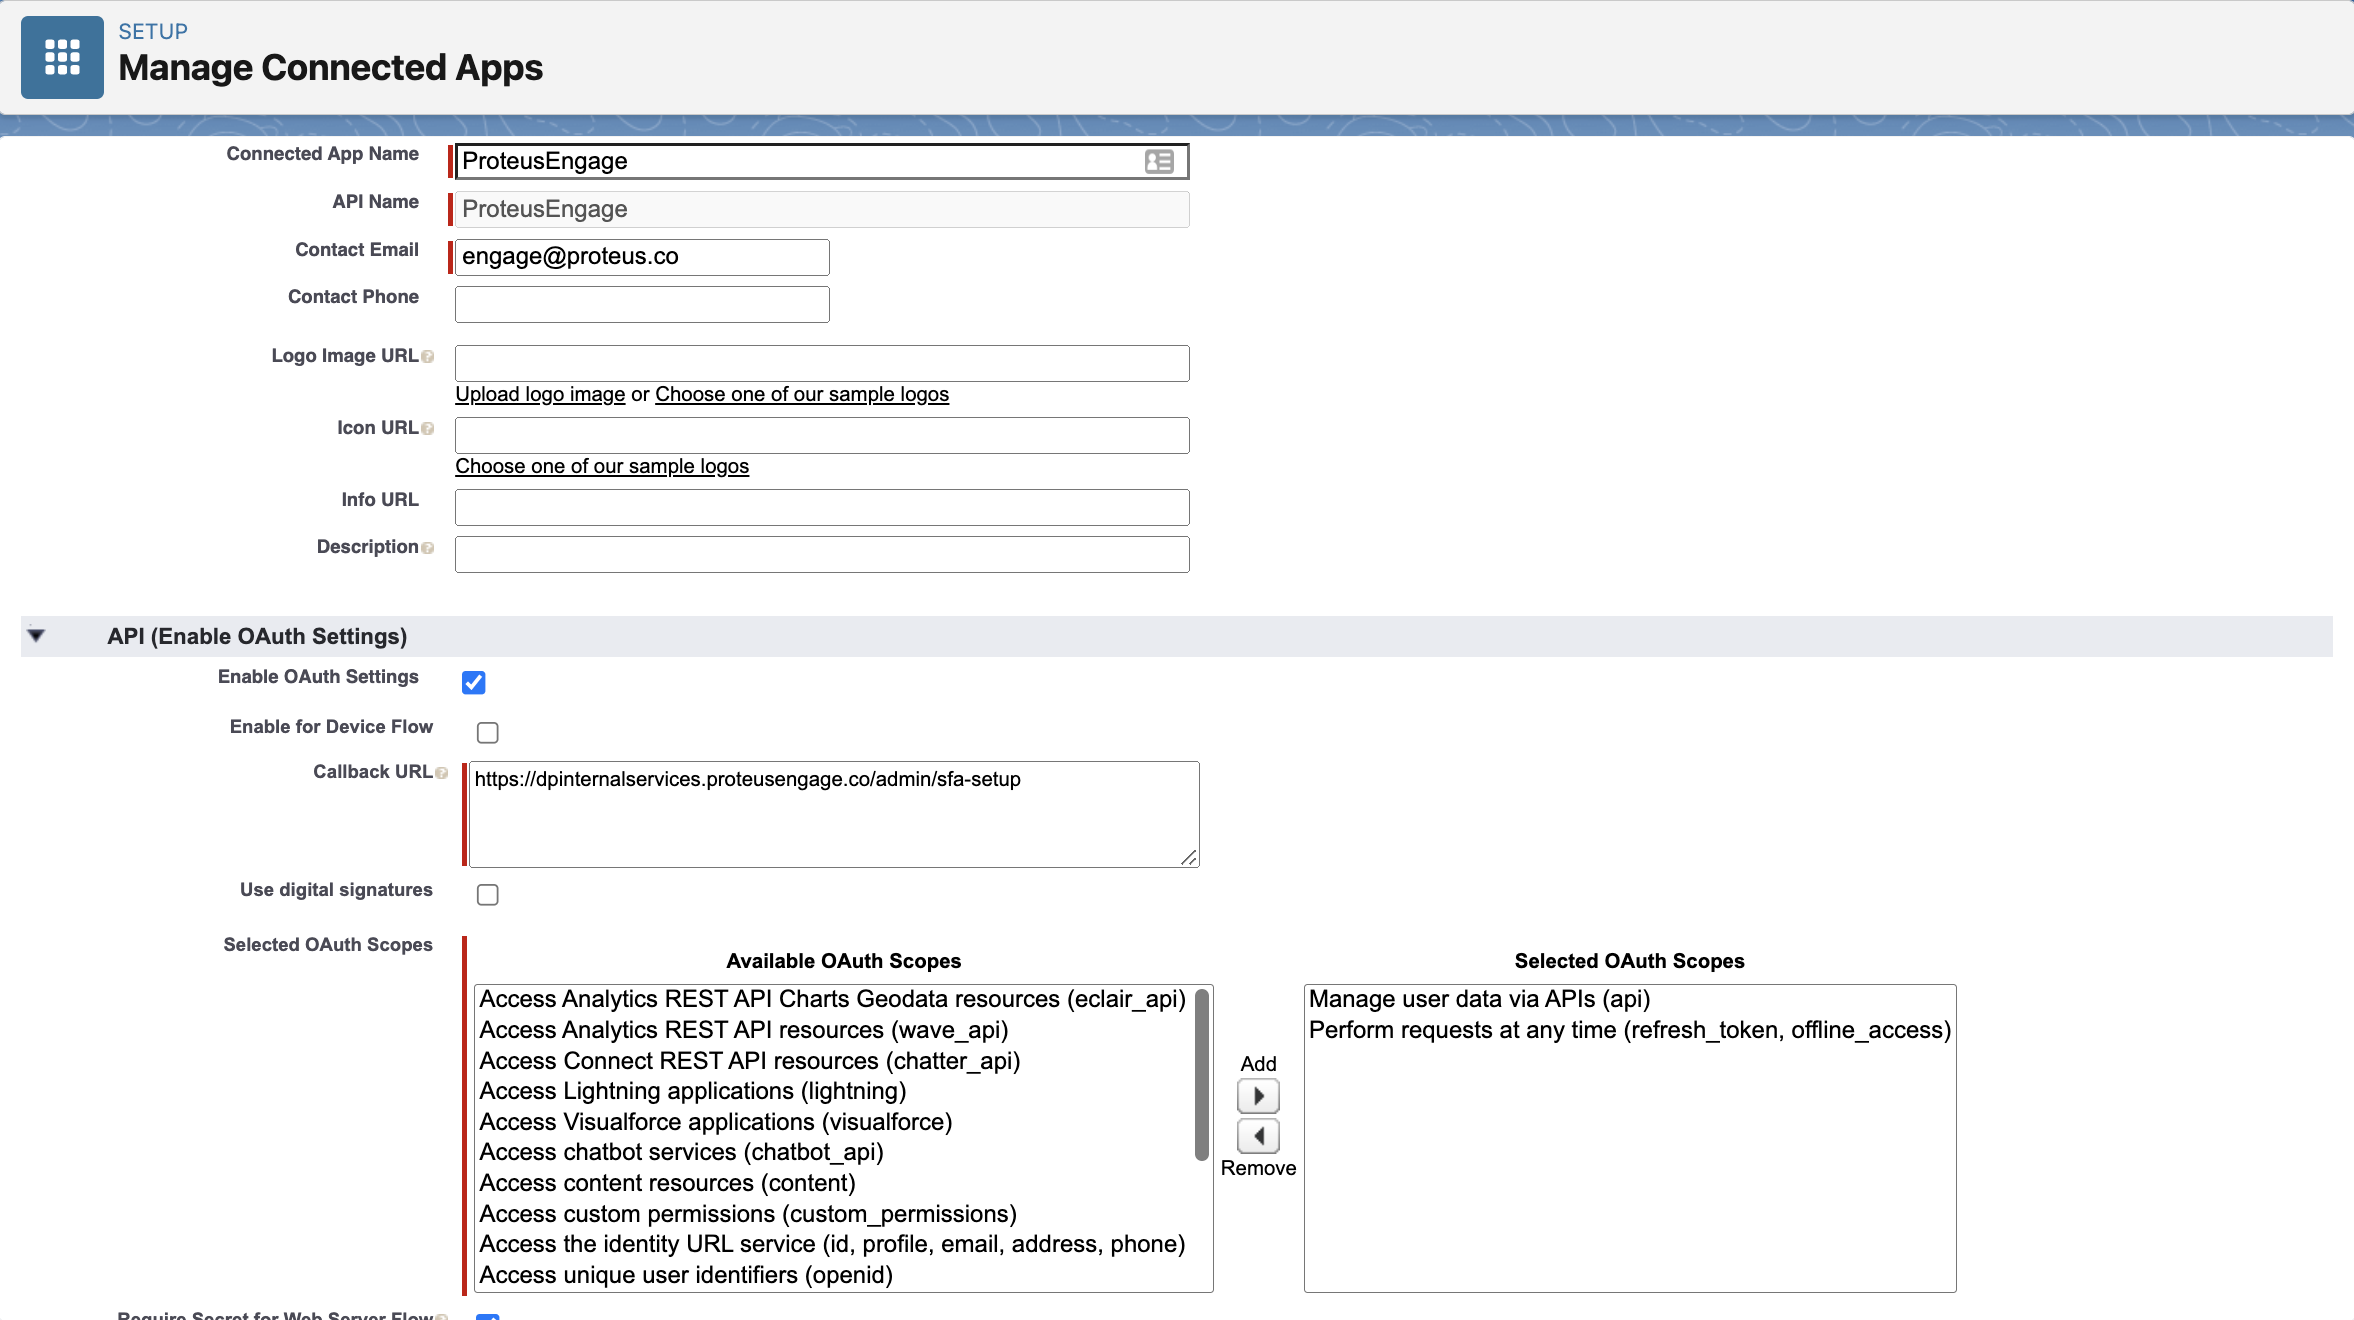
- Check Enable OAuth Settings checkbox in API (Enable OAuth Settings) area
- Fill in the Callback URL using Customer’s URL: https://CompanyName.proteusengage.co/admin/sfa-setup
- Note: If connecting to the Engage Stage environment then use this instead:
- https://CompanyName.stage.proteusengage.dev/admin/sfa-setup
- Note: If connecting to the Engage Stage environment then use this instead:
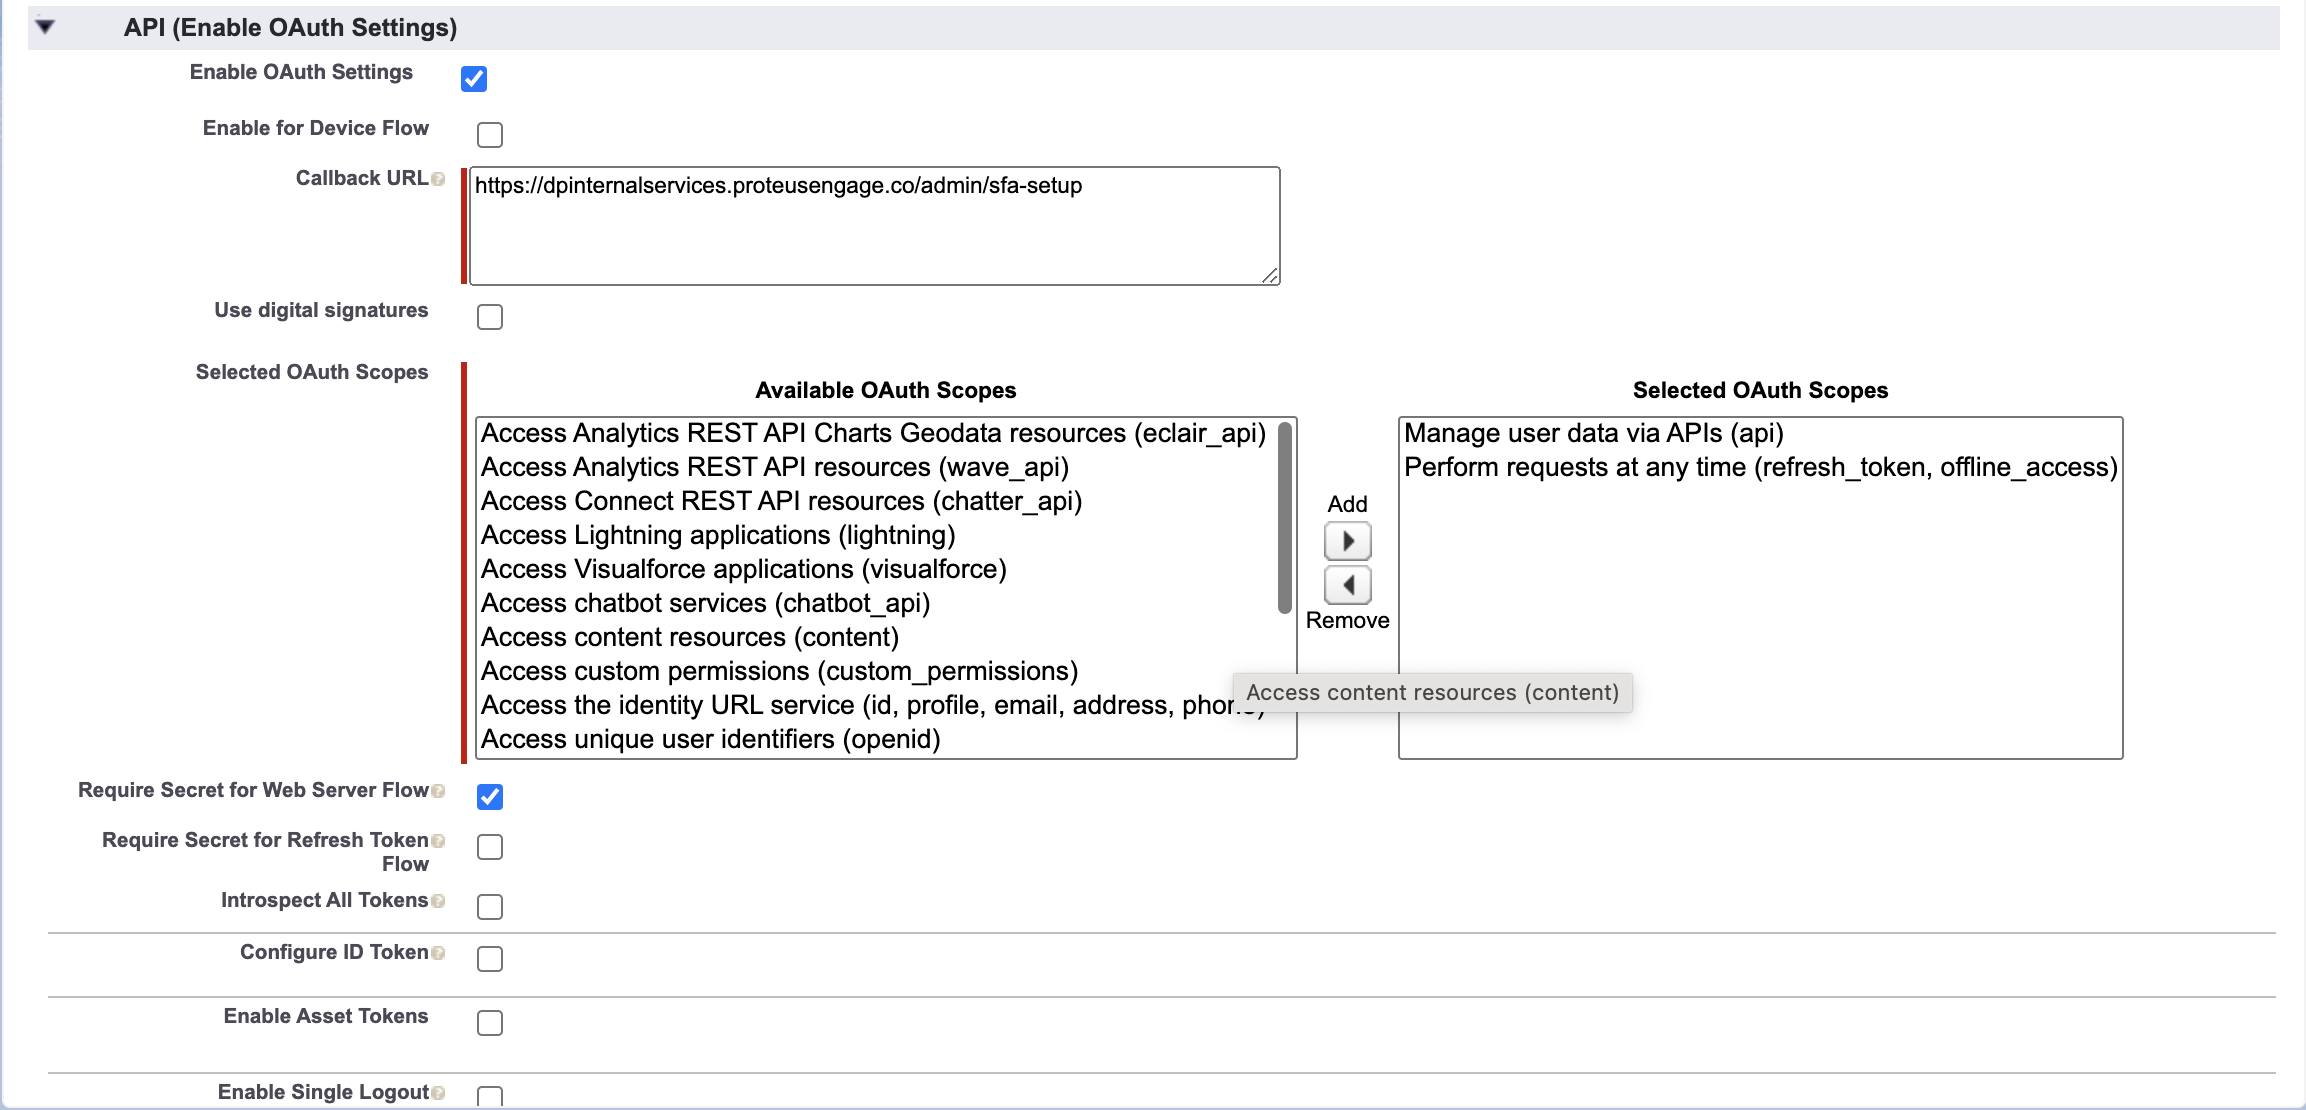
- Under the API section mark Access and Manage your data and Perform Requests on your behalf at any time (see below)
- Note: Salesforce could change the verbiage of the OAuth Scopes. The latest update verbiage for these two options are "Perform requests at any time (refresh_token, offline_access)" and "Manage user data via APIs (api)".
- Note: Salesforce could change the verbiage of the OAuth Scopes. The latest update verbiage for these two options are "Perform requests at any time (refresh_token, offline_access)" and "Manage user data via APIs (api)".
- If using the embedded file management component:
- Select the checkbox "Canvas"
- Enter the Canvas URL: https://CompanyName.proteusengage.co/sfa/canvas (or
- https://CompanyName.stage.proteusengage.dev/sfa/canvas
- Add "Lightning Component" under Locations
- Copy the consumer key and secret key into a Word or text document to be used later
- Press save
- (If using the embedded file management component) After saving the connected app, navigate to
"Manage Connected Apps :: Edit Engage App" and set “Permitted Users” so that admin can preauthorize users.
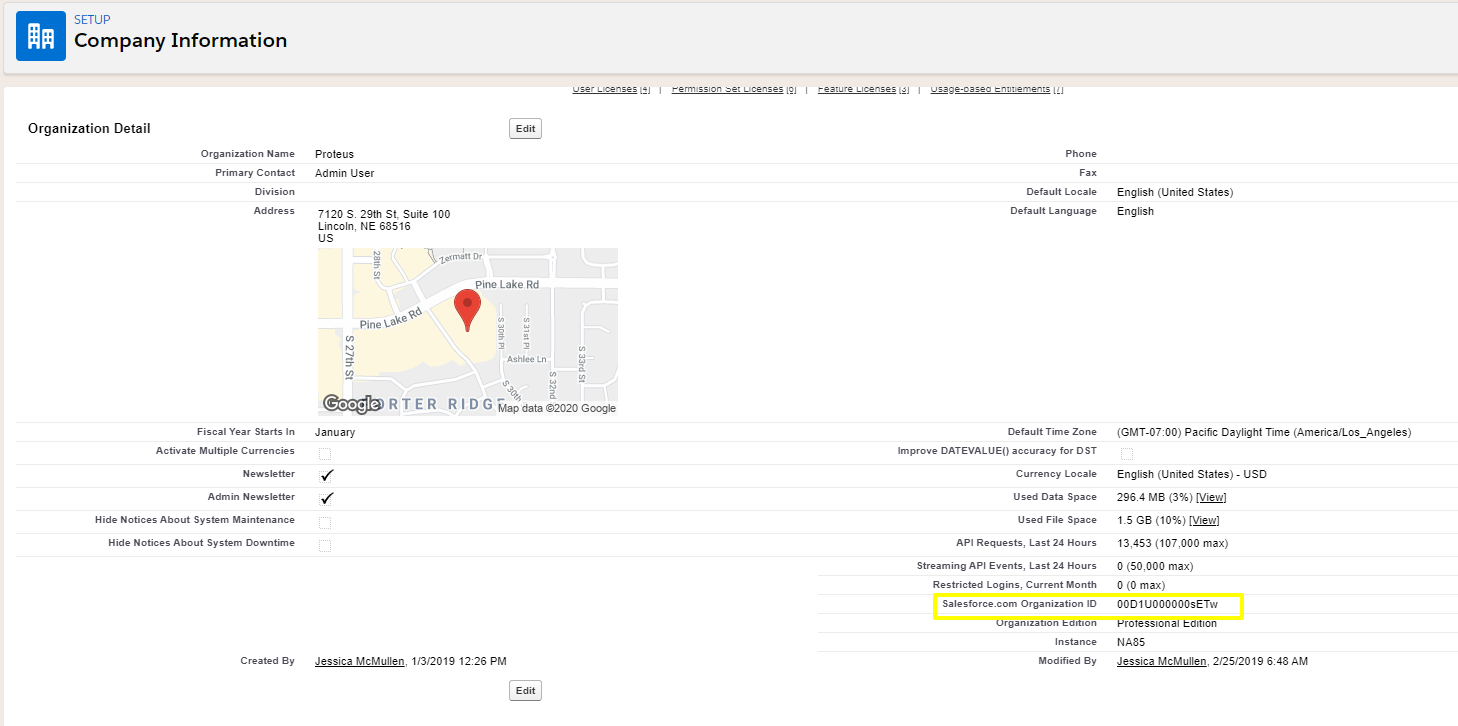
- Look up the SalesForce Organization ID under “Company Information” in SalesForce Setup. Save this out to the same document as the Consumer Key and Secret Key (see below for location of ID)
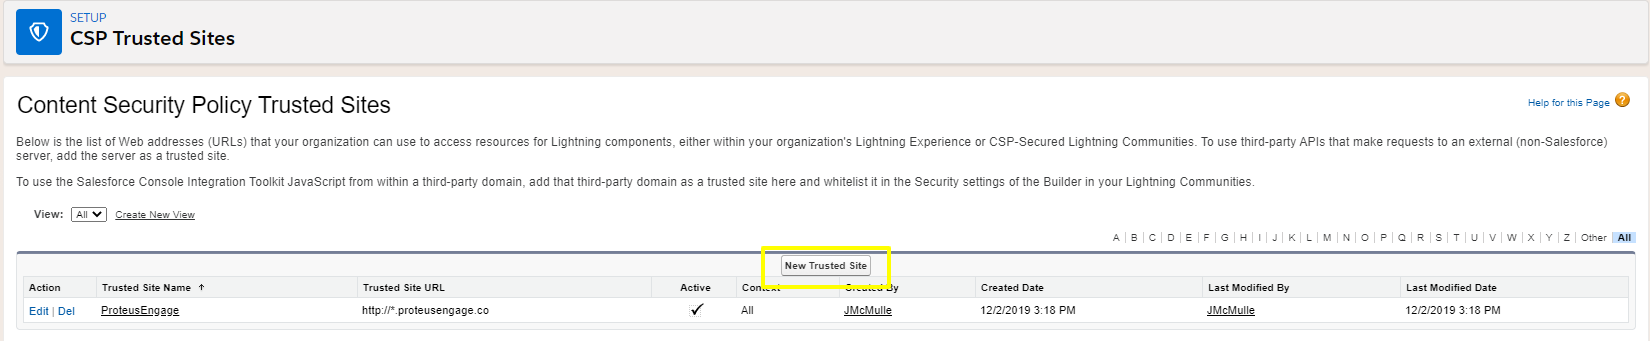
- Configure a CSP Trusted Site for *.proteusengage.co:
- Go to Salesforce Setup
- Search for CSP and click on CSP Trusted Sites
- Select New Trusted Site (near the middle of the page above “Created By”)
- Name the trusted site ProteusEngage
- Enter the URL for the trusted site: *.proteusengage.co (or *.stage.proteusengage.dev if connecting to the Engage staging environment)
- Click Save
- In Salesforce, configure the ProteusEngage component onto an Opportunity Detail Page (following these steps but on the Account Detail Page if workspaces are created from SF accounts)
- Open an Opportunity Detail Page
- Click on the gear icon towards the top of the page to go to Edit Page
- Look for the Custom Component named ProteusEngage towards the bottom of the left-hand side, under components (if it does not show up, click Deploy My Domain and then click “Deploy to Users” and repeat steps 2a and 2b)
- Drag that button to the desired location on the page
- Select it and on the right-hand side paste in the SalesForce Org ID copied previously
- Change the ProteusEngage URL to api.proteusengage.co (or api.stage.proteusengage.dev if connecting to Engage Staging environment)
- Click Assign as Org Default after pop up and choose both Desktop and Phone
- Click Save and then click the back button
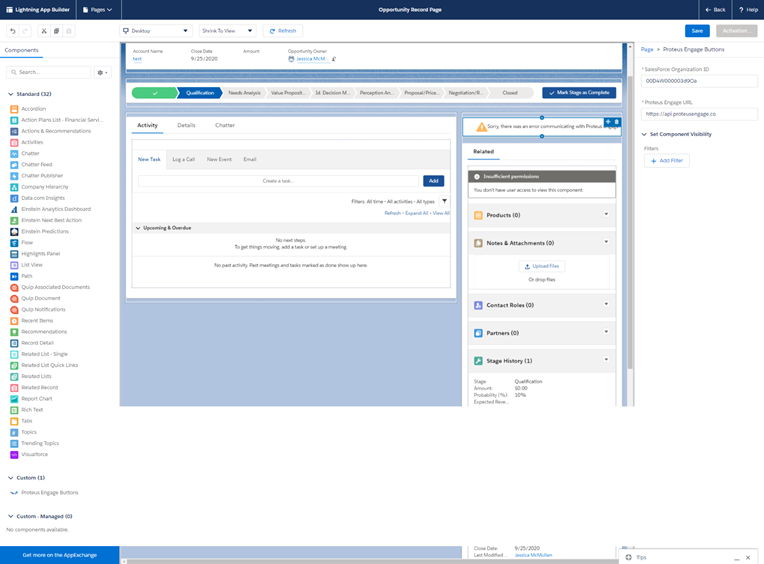
- (If using the embedded file management component) Also add the ProteusEngageWorkspaceFiles to a the same page you created above
- In Salesforce, configure which users are allowed to access the ProteusEngage Connected App. This is normally done via "Profiles" or "Permission Sets" and you can manage the settings in the "Manage Connected App" screen. The user who does the connection in the next step as well as any users of the "Engage Workspace Files" component will need to have access to the app.
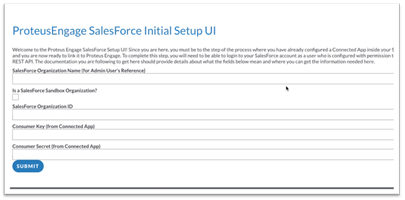
- In Engage, configure the Connected App via https://CompanyName.proteusengage.co/admin/sfa-setup (or https://CompanyName.stage.proteusengage.dev/admin/sfa-setup for Engage staging environment)
- Fill in the Salesforce Organization Name as whatever you prefer
- Paste the saved consumer key, secret key, and SalesForce Organization ID into the Engage Initial Setup UI page
- It can take 10-15 minutes after the app is created above before the Connected App is ready to use in Salesforce, but should be ready by now.
- (Optional) Test the link between Engage and Salesforce by using (creating if necessary) a testing Opportunity in Salesforce and using the SalesForce component to create a Workspace for it in Engage.
- Discuss the process for linking existing Workspaces to Salesforce Opportunities.
- Discuss how the Workspace statuses should work with respect to Opportunity Stages (if applicable).
Things to consider
If the integration is carried out between an Engage non-production environment, such as Engage Stage, and a Salesforce non-production environment, such as Salesforce sandbox, please keep in mind some of the limitations, not exhausting list:
- The Engage URLs provided above are to Engage production environment. Engage Client Success Manager must consult with the engineering team on which Engage testing environment can be used.
- Engage non-production environment might not be turned on 24/7. Engage Client Success Manager must consult with the engineering team to leave it turn on during the testing duration.
- A disconnection between Salesforce sandbox and Engage Stage happens for known (refresh token expired, connected user account disabled, etc) or unknown reasons. You will notice that no activities are sent from Engage to Salesforce nor new workspaces/contacts can be created in Engage from Salesforce. When this happens, two things must be done for reconnection:
- disconnect the Salesforce sandbox to the Engage testing site (Engage Client Success Manager must consult with the engineering team to disconnect the Salesforce sandbox).
- reconfigure the Connected App on Engage testing site again – repeating the above step 10
Questions? Please click the "HELP?" button in the upper right corner of your Engage screen or contact support.